Sony G70 Tube Replacement Instructions
These instructions were not written by me, they were written by JohnHWman, check out his site. A big thank you to John for allowing me to host this information on my site, I am sure my readers will appreciate it. I have swapped out the tubes on my projector but my tubes came with the LC housing attached so I didn’t have to go through those steps. This guide would have been very helpful for me back when I did it, I hope you find it helpful too.
This procedure will allow people to mount bare tubes on the Sony original LC metal housing without the need of glycol replacement. Bare tubes are far cheaper than Sony original tubes with LC housing assemblies.
First main part is to remove the toasted tube and LC housing from G70 unit :
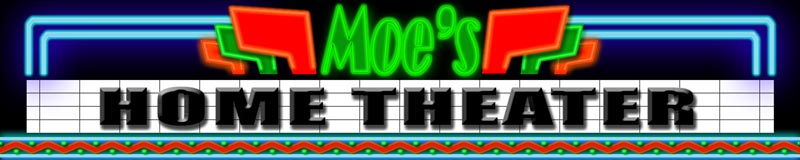
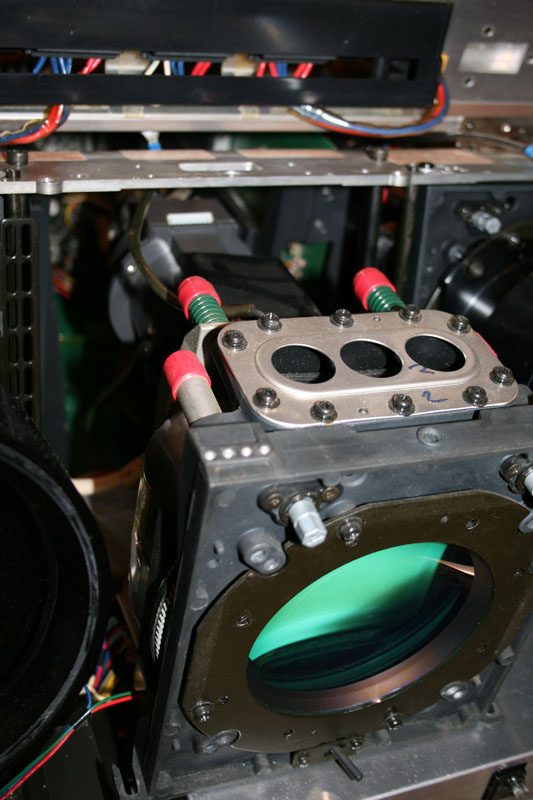
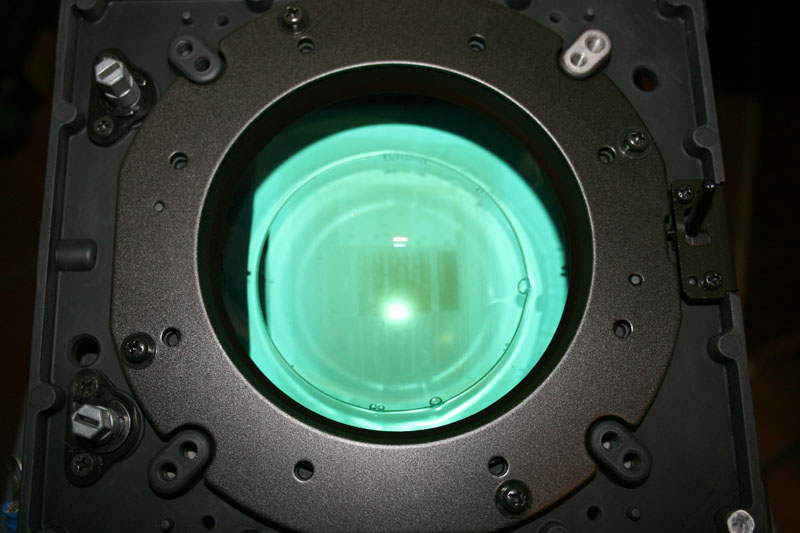
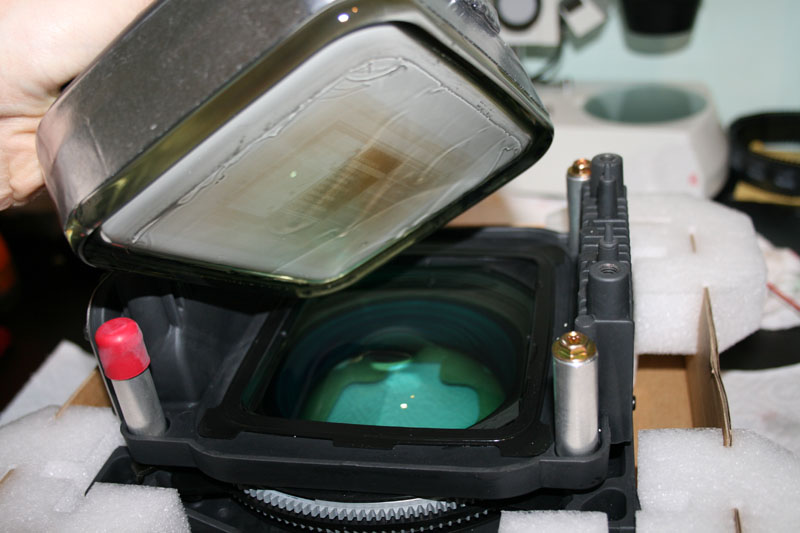
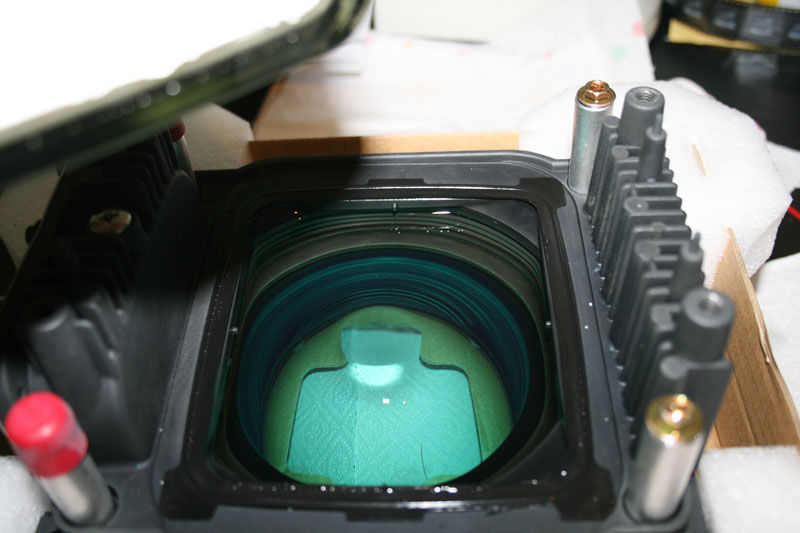
Step 1 After plastic front cover removal, disassemble the lens from the LC housing using a 300mm long neck Philips screwdriver. Unscrew the four lens screws from bottom to top. Take care to hold the lens with left hand while removing the last screw and gently remove the lens away along the same tube center axis to avoid lens damage from the C-element’s sharp circular edges !
Step 2 Disassemble the original tube’s C-block at the tube ends neck by unscrewing the secured neck screw and twist the block to the right/left alternately to unplug it completely:

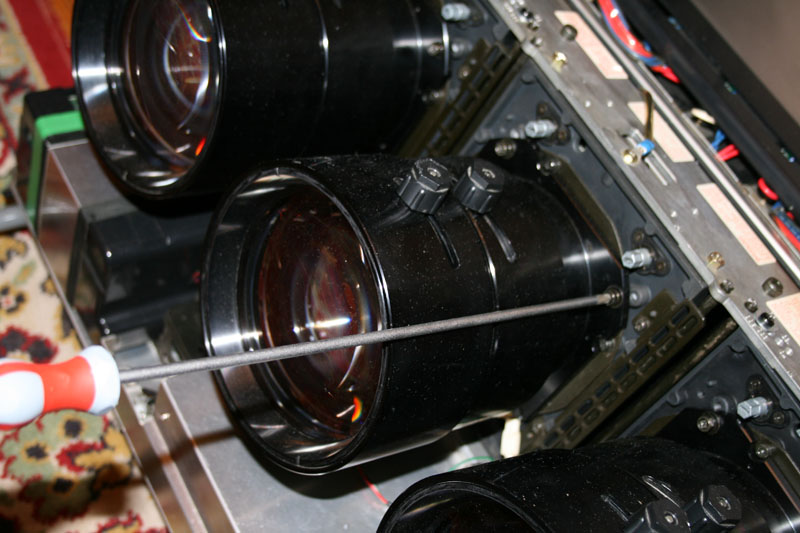
Step 3 Disconnect all the DY/Sub-DY/MG and 2P/4P coils connectors:
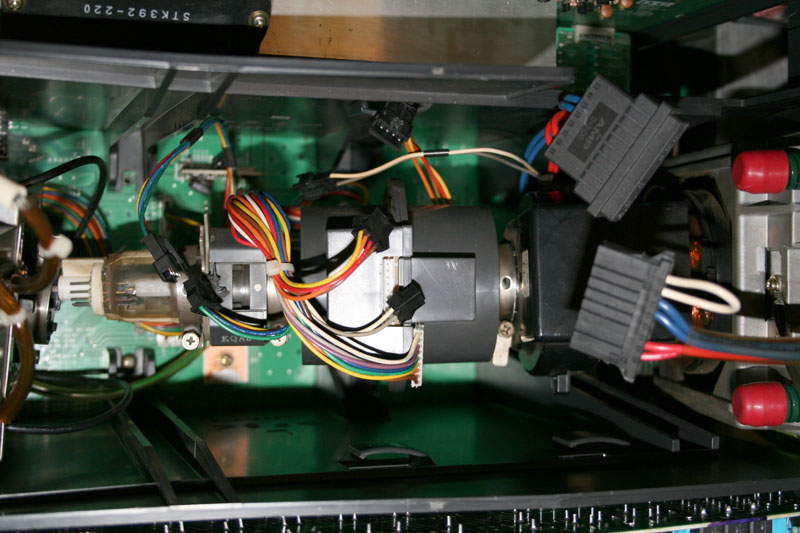
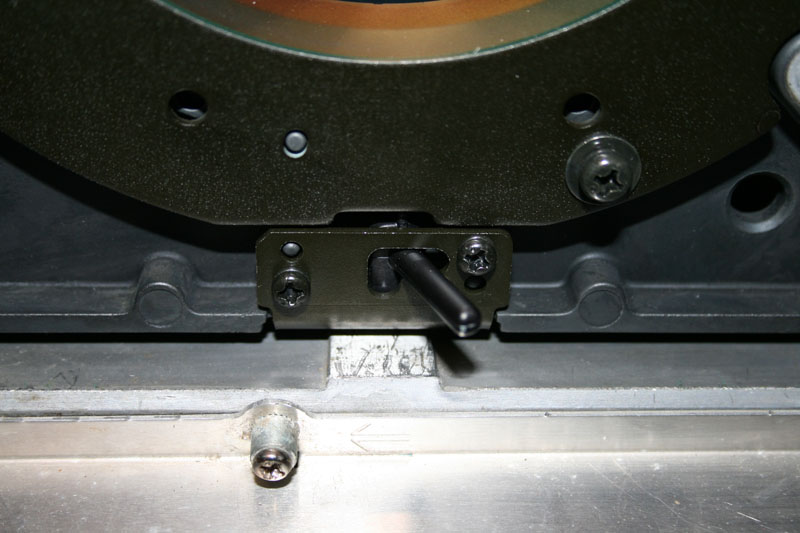
Step 4 Disconnect the tube’s relevant HV lead from the HV block close to the blue tube by first removing the silicon gray cap from the block and then press down and rotate the red wire 90° to remove it:
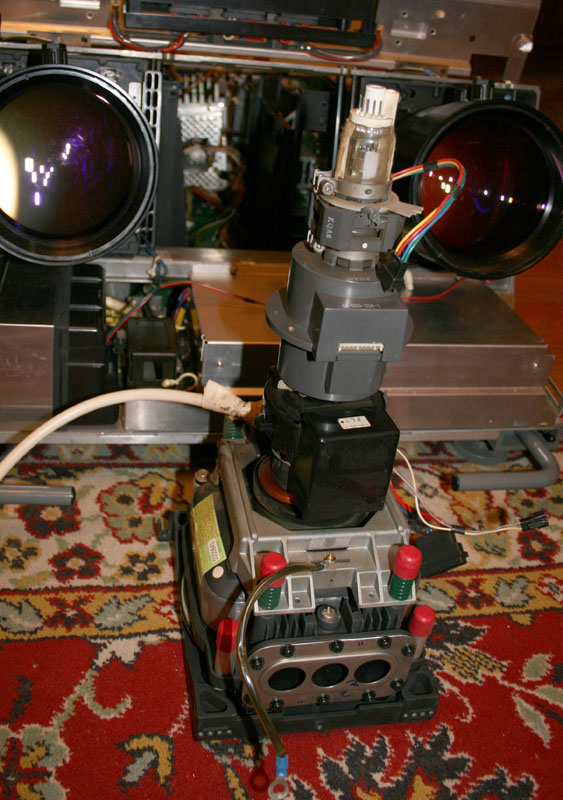
Step 5 Unscrew all of the tube’s LC housing top screws (two long black and two short gold):

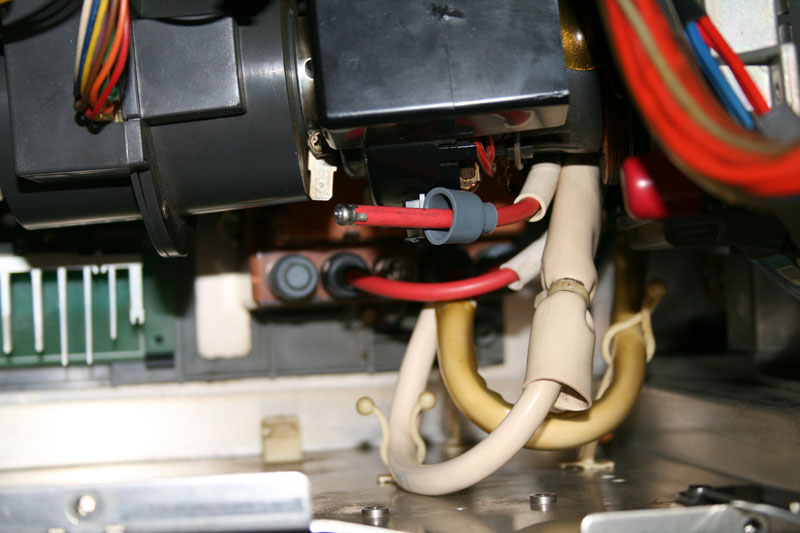
Step 6 Unscrew the top tube rotation screw and chassis ground lead:

Step 7 Slide the bottom rotation tube axis up and to the right as follows:

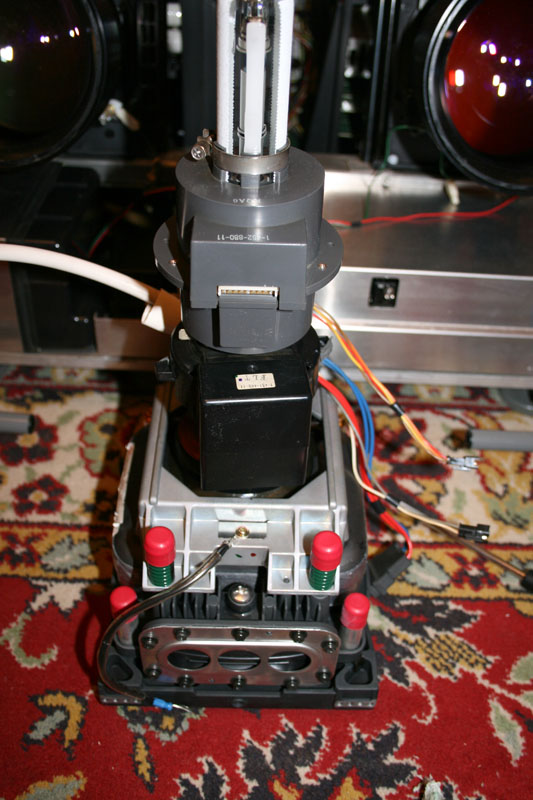
Step 8 Carefully slide-out the complete assembly with one hand on the LC housing and the other on the tube neck end. Ensure that you do not stress any wires/connectors during this operation:
Step 9 Leave the tube on a smooth surface facing down as follows:
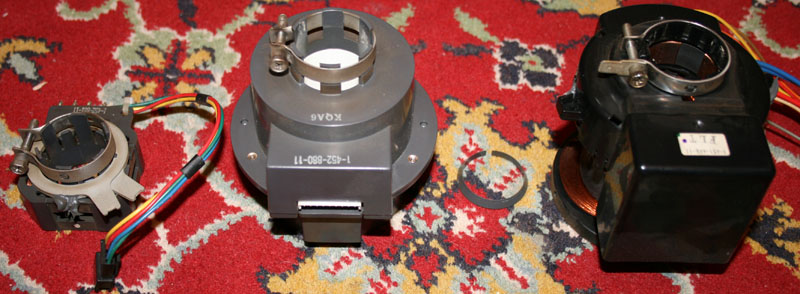
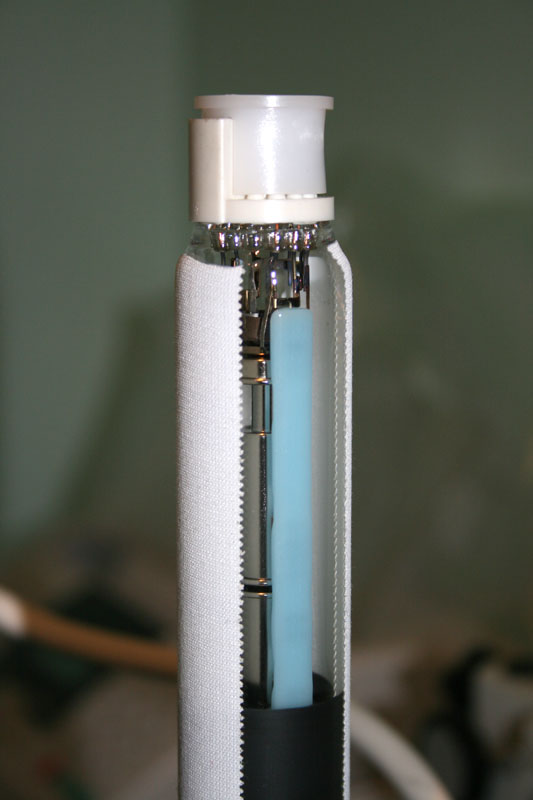
Step 10 Unscrew all DY/Sub-DY/MG and 2P/4P coils assemblies screws around the tube neck and place them in the same order/orientation on the floor (don’t forget to carefully remove the plastic wedge located between Sub-DY and MG coils):
Second part of this procedure is to replace the toasted tube with the new bare one using the Sony original LC housing. This part is sub divided in ten sections:
– Removal of 150-200ml of glycol from the LC tank
– Removal of the tube’s metal pressure bracket
– Removal of the HV lead silicon cup
– Cleaning remaining silicon traces from the HV lead silicon cup
– Glueing the HV lead silicon cup on the new tube
– Old/new tube swap using the LC housing still filled with most of the glycol
– Putting the 150-200ml of glycol back in the LC tank
– Placing tissue/scotch tape on new tube neck
– Placing the DY/Sub-DY/MG and 2P/4P coils back on the tube neck
– Tube placement and re-wiring inside the G70
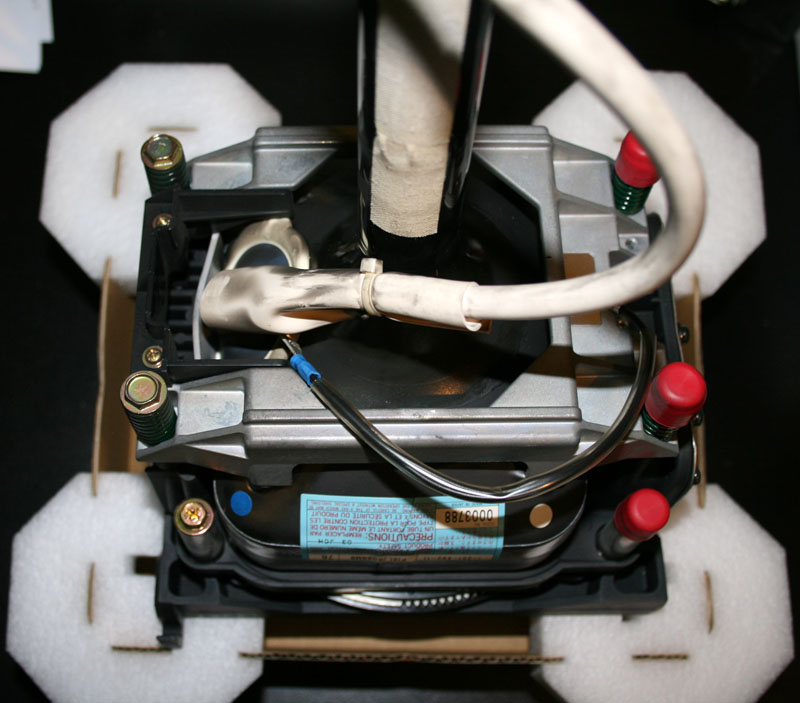
Step 11 Place the toasted tube + LC housing on a proper/stable surface:
Step 12 Buy a 50ml plastic syringe and add a 2mm diameter thin spray tube on the end:

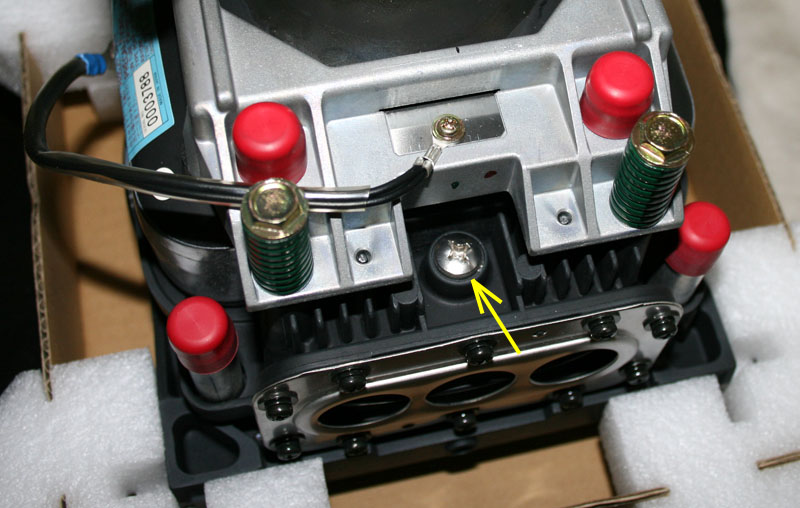
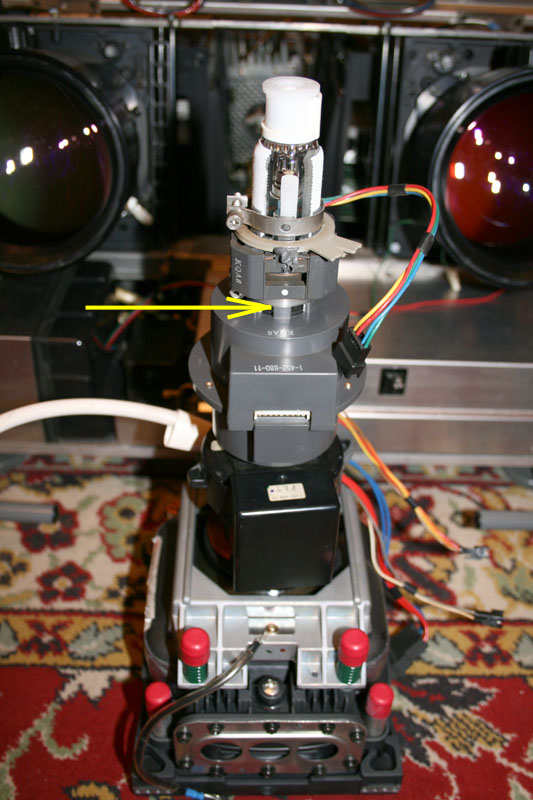
Step 13 Locate the glycol tank filling screw:
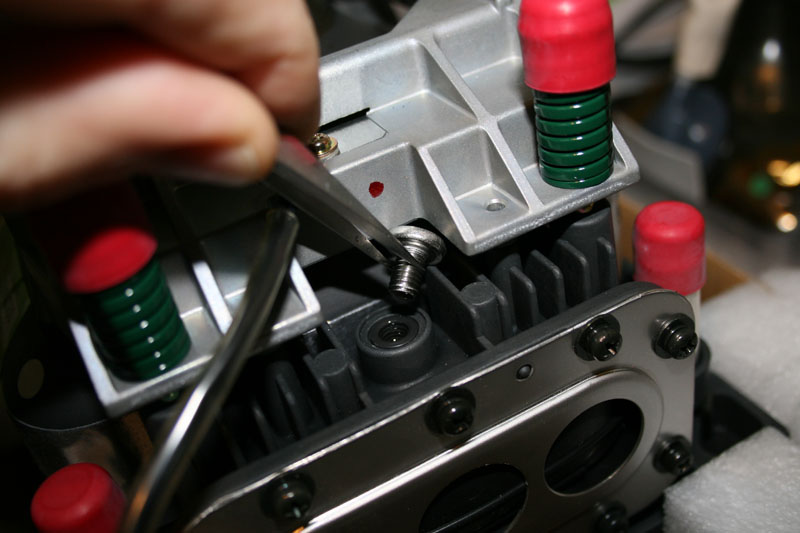
Step 14 Unscrew the tank filling screw and leave the annular rubber joint in place:
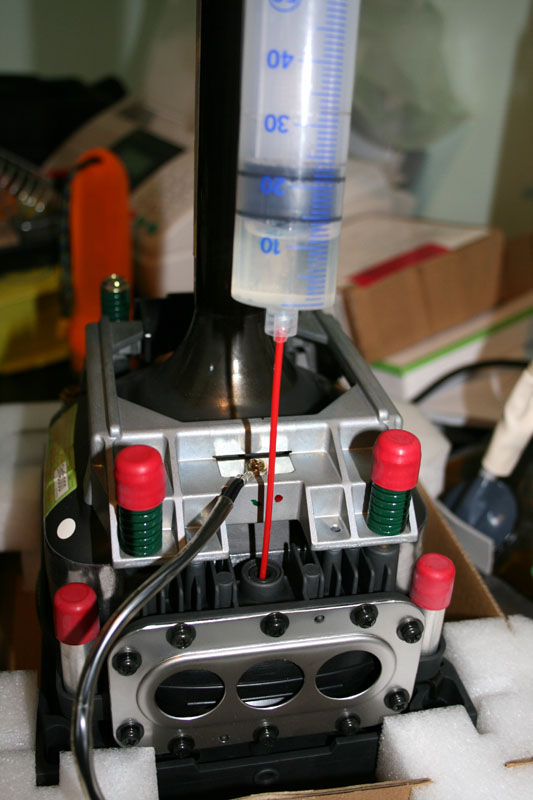
Step 15 Using the syringe, remove glycol from the tank:
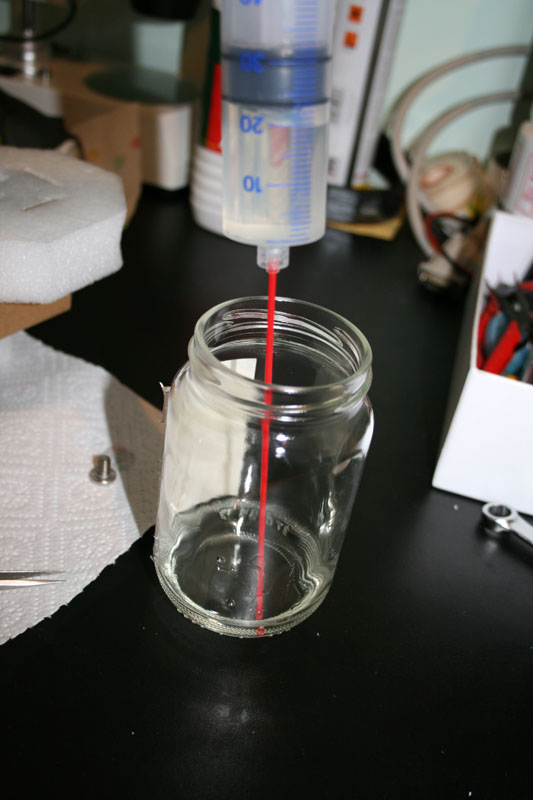
Step 16 Transfer the glycol in the syringe into a CLEAN and DRY glass. Be very careful to not spill any glycol as it is very corrosive to just about everything (including human skin!):
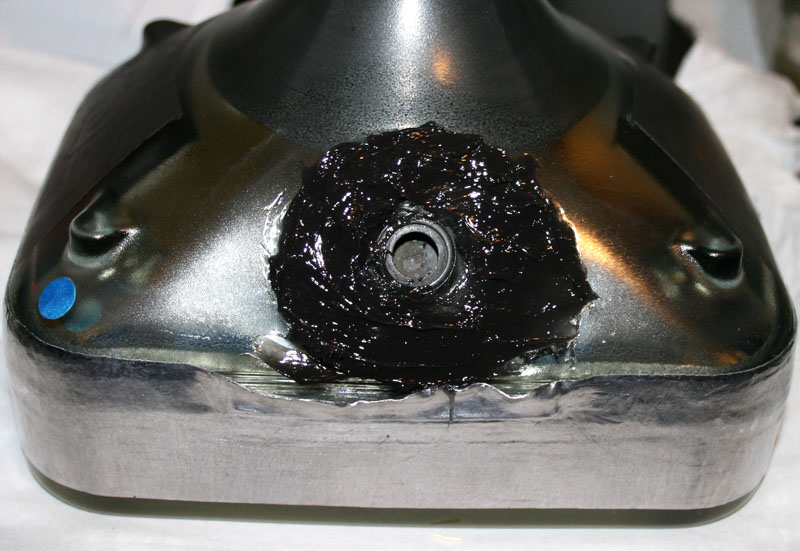
Step 17 Repeat this glycol removal step three times removing approximately 50-60ml each time such that the quantity removed is approximately150-200ml. At each step, gently tilt the tube to let air bubbles enter the tank in the C-element chamber (which then re-fills the tank with glycol). At the end (and after replacing the glycol chamber screw!) the C-element looks like this:
Step 18 After checking that the glycol chamber screw is correctly back in place, unscrew the four metal bracket screws 2 turn at a time alternating in diagonal/crossing order:

Step 19 Do this until you can remove the metal bracket from the tube. Be careful to NOT move the glass tube itself from the LC housing:

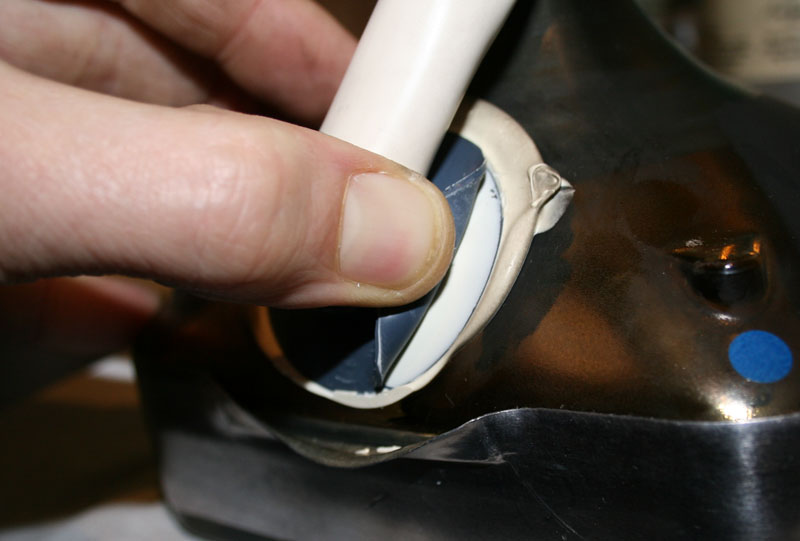
Step 20 While still being careful to NOT move the glass tube itself from the LC housing, cut the circular outer edge of the HV silicon cup with a sharp cutter/blade. Then, using a small flat screwdriver, gently pry up the cup from the white silicon. Do it VERY slowly so that most of the white silicon remains on the glass:
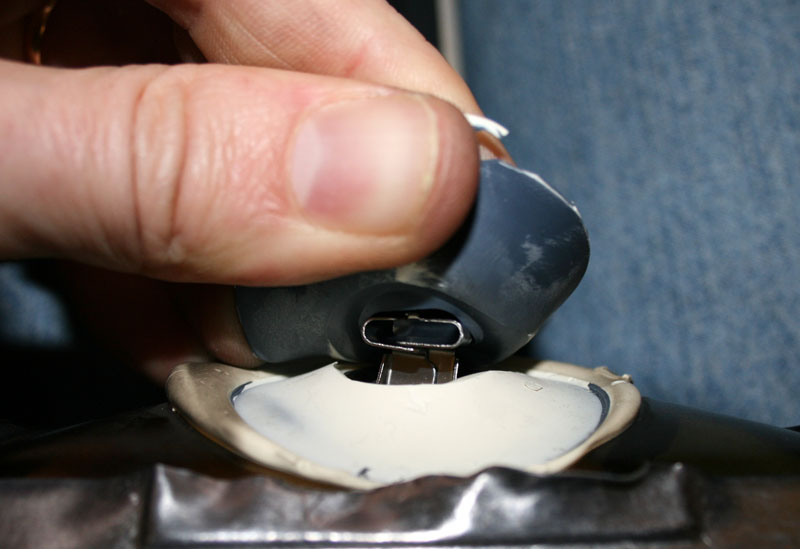
Step 21 Continue to SLOWLY pry up the cup all around the center hole:
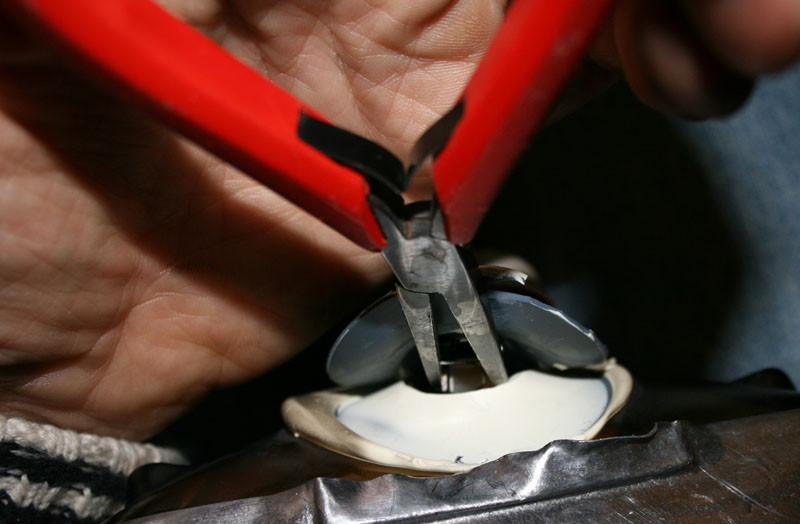
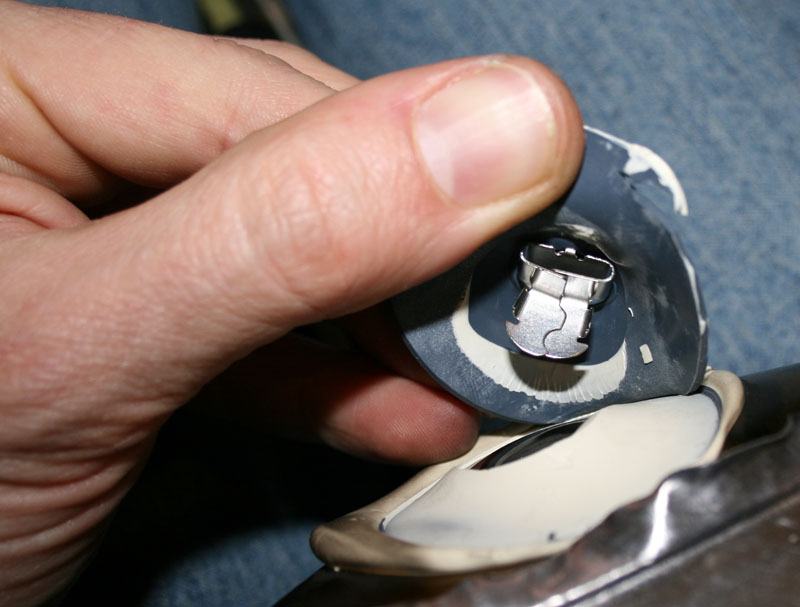
Step 22 Using a pair of needle nose pliers, squeeze the metal leads together in order to remove the HV cup from the hole:
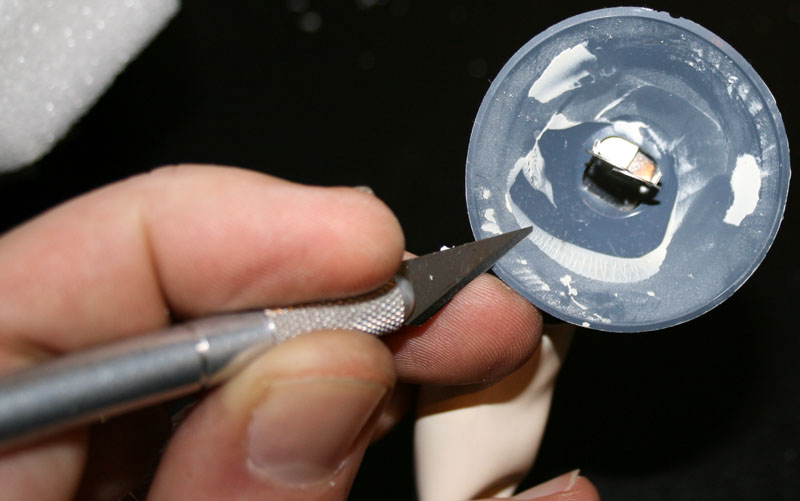
Step 23 Using a sharp cutter/blade, clean the remaining white silicon from the inside of the cup (you can use acetone liquid cleaner to help in removing small silicon spots):
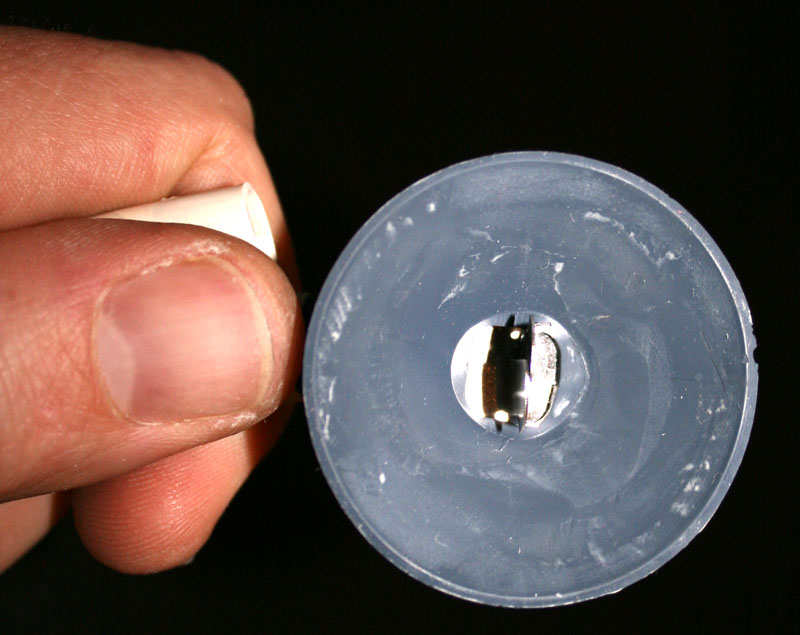
Step 24 The inside must be clean and look like this when you’re done:
Step 25 Place the new bare tube on the bench face down and prepare the cleaned HV cup this way (reversed vs wire output) using strong adhesive tape. This can ease the next operation:

Step 26 Place HV silicon (Dow corning 3145RTV or equivalent) all around the tube’s HV hole. Do NOT put silicon WITHIN the hole:
Step 27 Place the HV cup in the hole such that the metal anchor fits WITHIN the hole and press down on the cup in a circular motion such that the excess of silicon squeezes out around the cup. Clean excess silicon off the tube:

LET THE TUBE SILICON COMPLETELY DRY BY LEAVING IT FOR 7 DAYS AT 20°C AMBIENT TEMPERATURE.
Step 28 After waiting 7 days, prepare the new tube with the old one still on its LC housing close by. With your left hand gently tilt the old tube neck so the tube face gets removed from the LC housing joint:
No glycol should spit/splash. Remove the toasted tube from the LC housing in a fast movement so no dust can enter glycol chamber housing:
Step 29 Immediately place the new tube on the LC housing joint. Take extra care to get the tube’s orientation right! Center the tube on the joint by looking at the tube neck end against the LC housing edges:

Step 30 Place back the metal bracket on the tube and screw the four metal bracket screws (do 2 turn each alternating in a diagonal/crossing order):

Step 31 Using the syringe, put the 150-200ml glycol back in the tank. At each 50ml step, gently tilt the tube to let the air bubbles exit the C-element chamber via the tank’s hole (this allows you to continue to fill the tank with glycol).

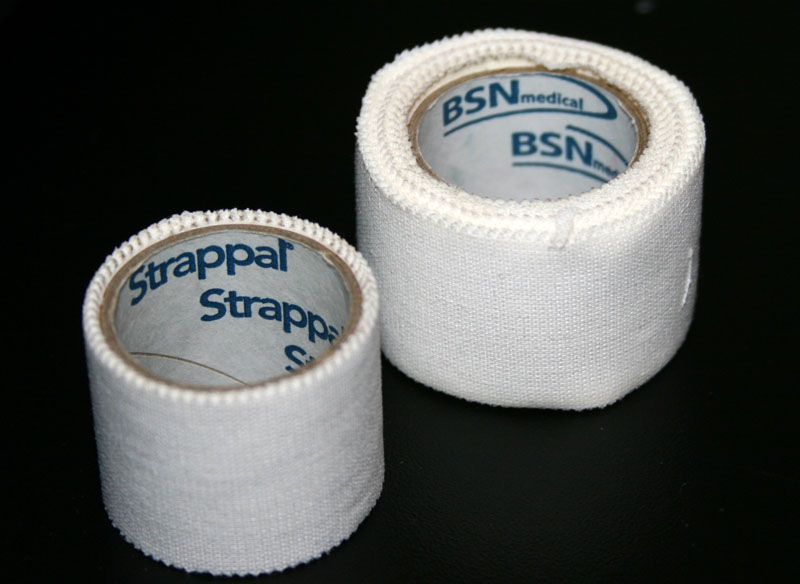
Step 32 Buy special (medical) adhesive tissue tape:
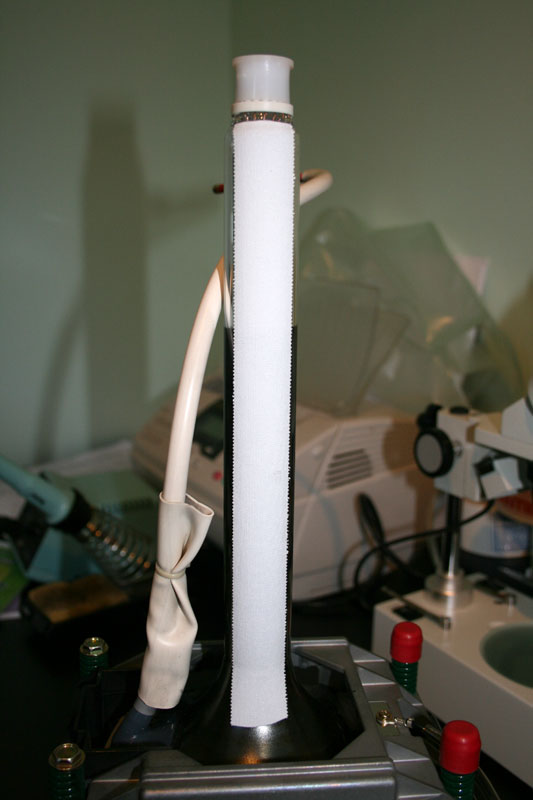
Step 33 Place two stripes of this (medical) adhesive tissue tape on the tube neck:
Step 34 Now get the DY/Sub DY/MG/2P/4P coils together with the small plastic wedge that you placed aside previously:

Step 35 Put back in place the DY/Sub DY coil and press it against the tube before screwing its circular neck screw. Then place the plastic wedge in the proper orientation:

Step 36 Put back in place the MG focus coil and press it against the DY coil neck before screwing its circular neck screw.
Step 37 Put back in place the 2P/4P coil and place it 6-8mm away from the MG coil neck before screwing its circular neck screw.
Warning : Do not over tighten the neckl screws against the tube neck or the glass may brake! Refer to the Sony service manual section 3 page 3 (tightening torque force is 80 to 120N.Cm (8.16 to 12.24kgF.Cm)).
Step 38 Now, carefully slide-in the complete assembly within the G70 unit, with one hand on LC housing and the other on the tube neck end. Check that every wire/connector is NOT stressed during this operation. Ensure that the HV lead comes in the right conduit. Then reconnect the C block to the tube neck. Ensure that the pins are well inserted within the C block tube’s socket by looking through the C block front grid holes. Then secure the neck screw:

Step 39 Re-connect all of the tubes relevant coils wires/connectors. Do not forget to re-connect the HV lead end to the HV block:

Step 40 Screw back in place all of the tube’s LC housing top screws (two long black screws and two short gold screws):
Step 41 Screw back in place the top tube rotation screw with the chassis ground lead:

Step 42 Slide the bottom rotation tube axis left and down:
Step 43 Open your G70 service manual (found at the bottom of my G70 page) in section 3 (adjustments) and redo section 1.3.1 to 1.3.11 adjustments for the relevant (new) tube(s). This will takes around four hours to do all these necessary adjustments.
Also use a thick rubber glove to manipulate the coils during section 3 of the Service manual adjustments since there is around 150V on the DY/sub-DY coils.
That’s all for the tube replacement procedure.
Enjoy
John
Filed Under Guides | Questions & Comments |
Comments & Questions
If you would like to make a comment, or ask me a question, please fill out the form below.
If you want a personalized image to appear with your comment you need a Gravatar.
Sign up for a Gravatar today. It's free and easy