
Sony G70 Fan Modification
This guide was not written by me nor have I done it to my projector. This guide was written by JohnHWman, check out his site.
Hello to all G70 owners !
Since I’ve been asked for information on silencing the Sony G70 projector and because I made it again for my brother’s G70 unit, I’ve decided to post this step by step procedure. This mod will cut the noise by approximately 8 dBA (nearly half the noise level).
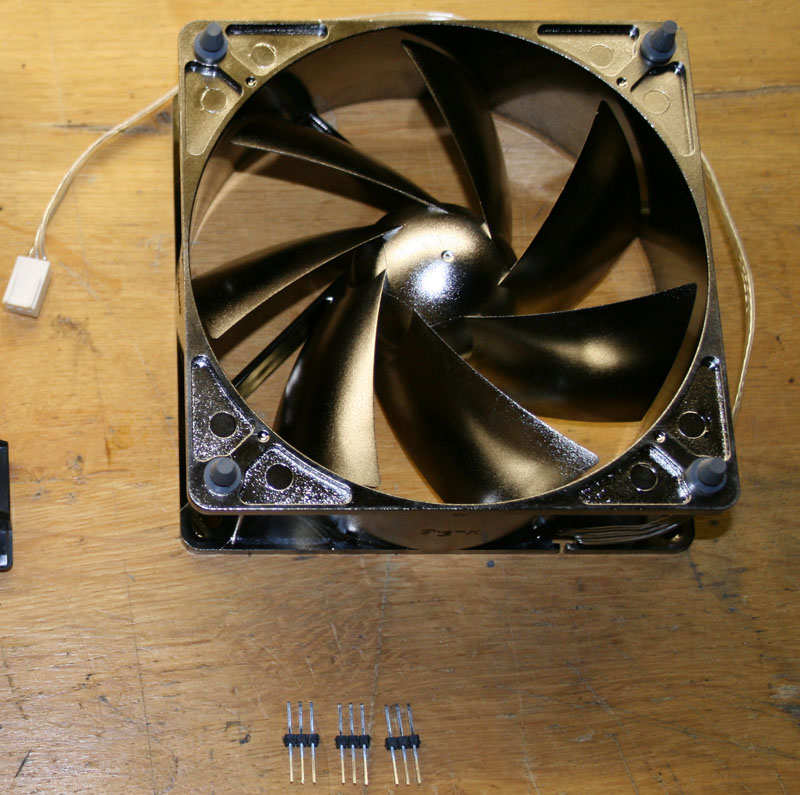
The G70 unit hold three 120x120x38mm Japan Servo CNDC12B4 (40dBA noise each !) that draw ~85CFM each. Then, I would assume that changing these fans to SilenX IXP-76-14 (72 CFM) is the best replacement part versus the original 85CFM. Note that there is also the 90CFM version (IXP-76-18) from SilenX that could be use for this fans replacement but the noise is rized from 14dBA to 18dBA each.
Here is the complete SilenX IXP-76-14 specifications
http://www.silenx.com/ixtremaprofans.asp?sku=ixp-76-14
SKU: IXP-76-14
Rated dBA: 14 dbA
Dimensions:120x120x38mm
RPM: 1200 rpm
airflow: 72 CFM
nominal Voltage: 12V
Current Draw: 0,20A
Power Consumption: 2.40W
Bearings: Hybrid Immersion
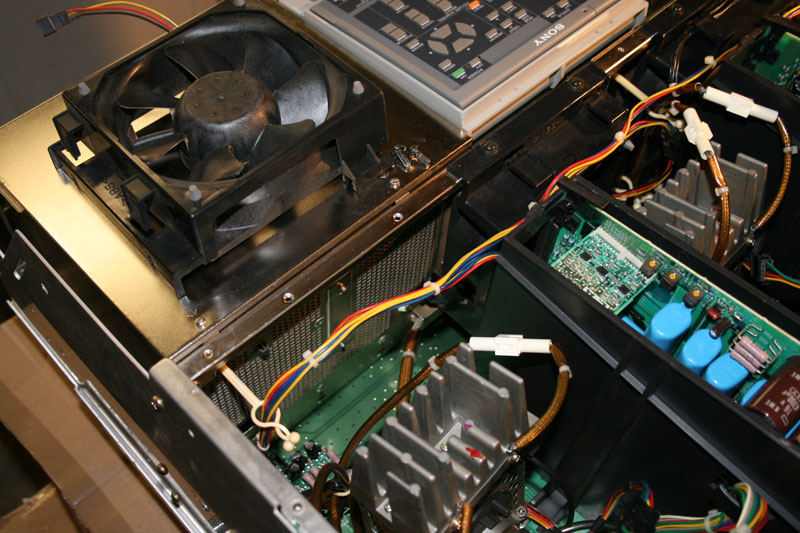
Step 1 Remove the G70 front and rear top ABS covers. Unscrew the center aluminium cover screw and open it toward the front. Remove the fans wiring assembly from the fans plastic housing tabs :
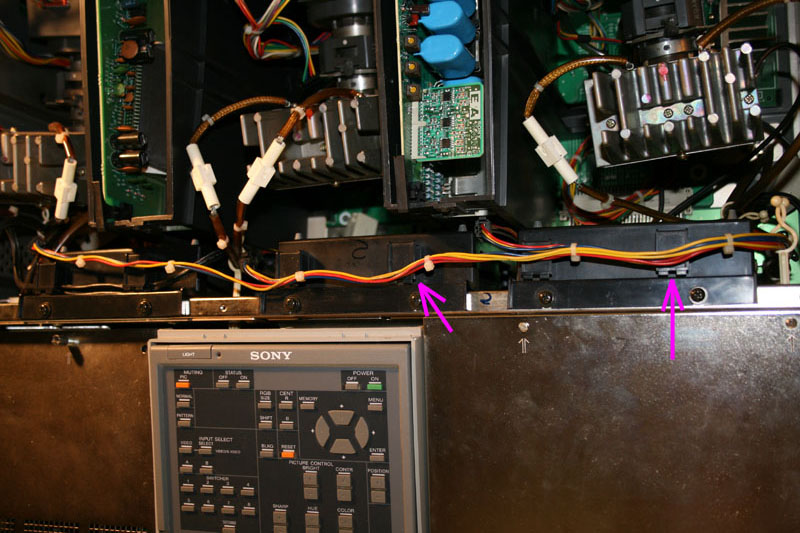
Finally unscrew the first fan plastic holder (two black top screws), disconnect the fan connector and remove the fan assembly out of the unit.
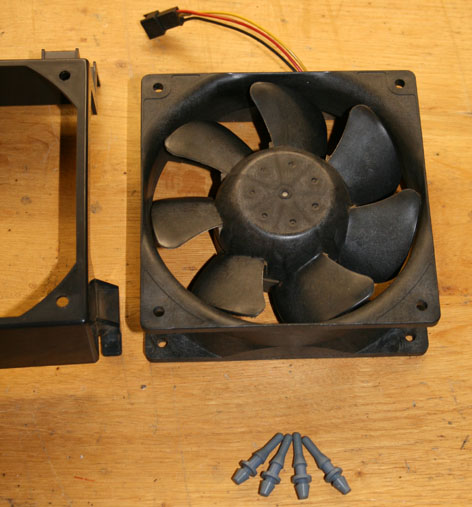
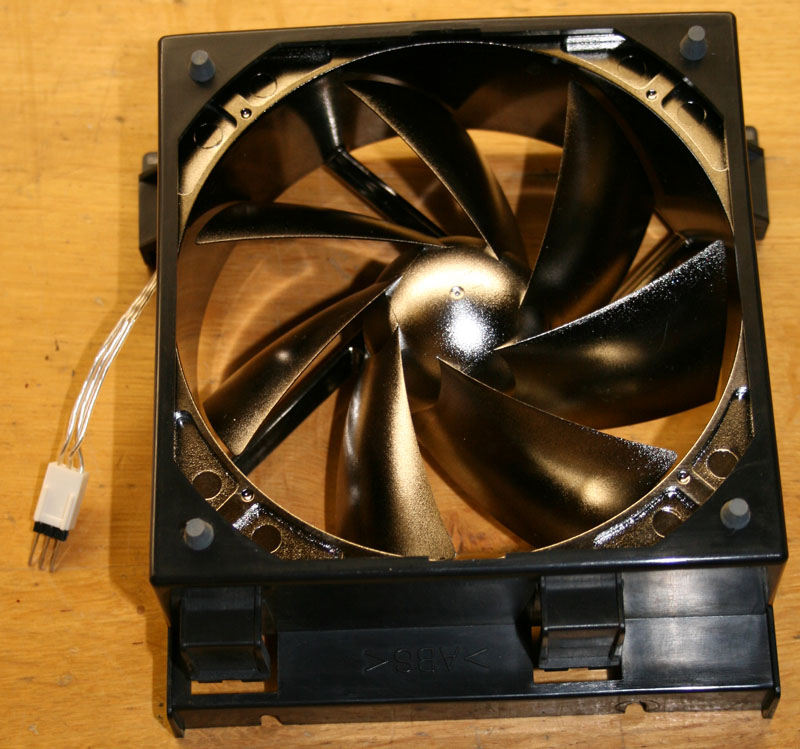
Step 2 Disassemble the original Sony fan from its housing by removing its four rubber spacers relief from the fan housing :

Then remove the four SilenX rubber spacers from the fan itself :
Step 3 Order one Samtec PCB header from RS-components/Radiospares (order code 277 9742 – see the Samtec relevant DS page in here). Update it to retreive three 3 pins headers like this :

Step 4 Place the four rubber spacers inside the SilenX new fan :
Step 5 Before placing the new fan inside the sony plastic housing, place the fan’s wires like this:
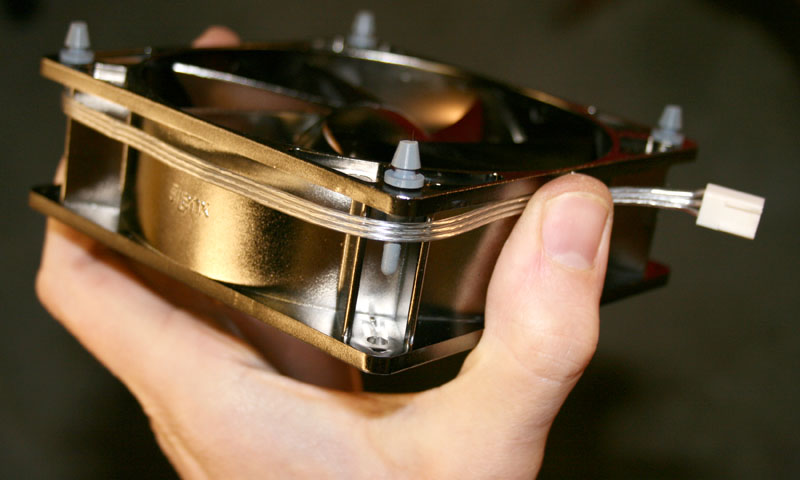
Step 6 Place the new SilenX fan with its four rubber spacers inside the Sony plastic housing :
Take car that the fan’s connector must been outputed on the right side !
Step 7 At this stage, update the SilenX white connector housing wiring to fit Sony wiring by swapping the +12V and SENSE wires:
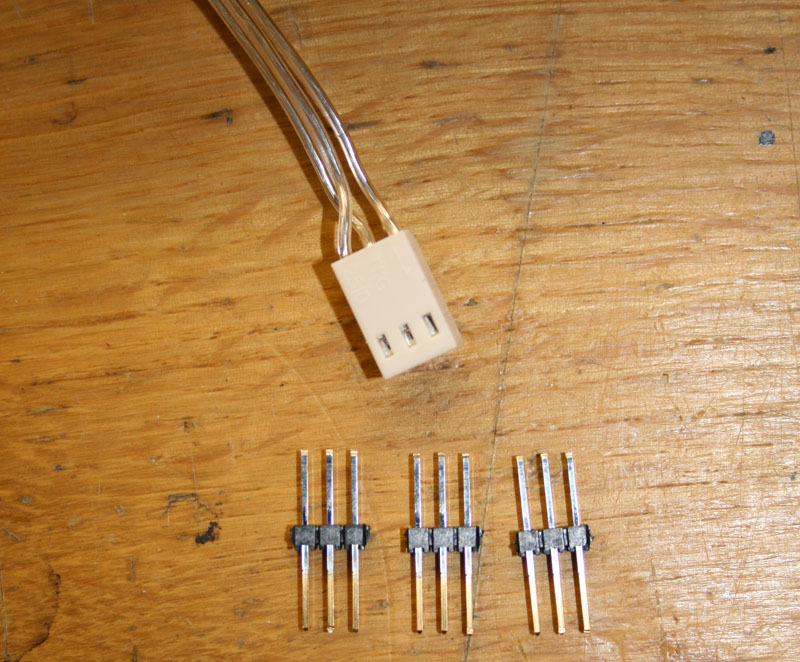
Step 8 Place the three pins header inside the SilenX connector housing:
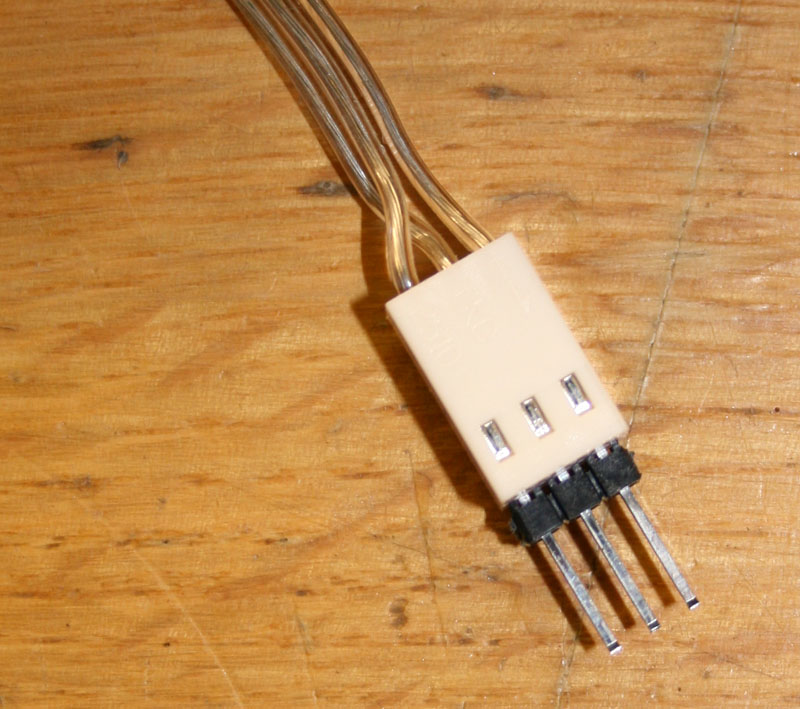
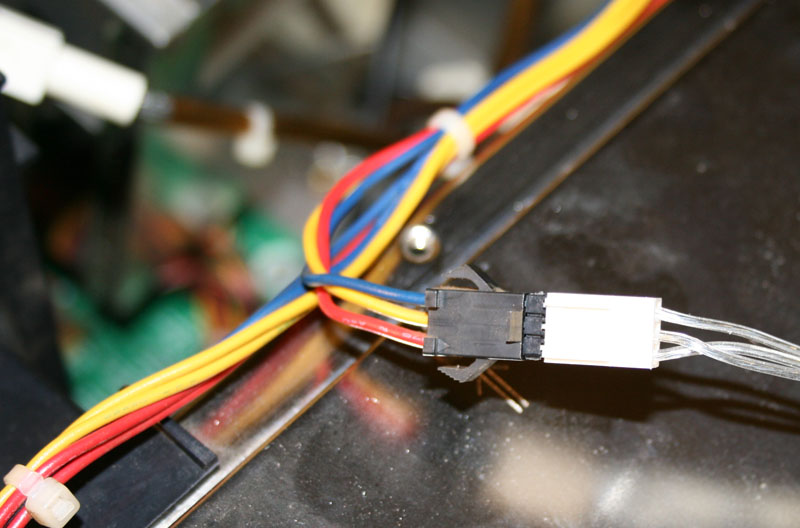
Step 9 Place the fan assembly back inside the G70 unit and Connect it to the Sony internal connector this way (you must check that wires colors vs SilenX connector housing is OK):
Step 10 Wrap 7cm of electrician scotch tape all around the connectors assembly:

Step 11 Place the fan+housing assembly back in place (check that lower tabs fit their slots) and place back the two black screws to secure it :

Step 12 Update the rest of the fans (2) exactly like the first one:

All noise measurements were made before and after the fan replacement at a 1m distance from the back of the G70 with it’s outer plastic shell removed (ie: worst case scenario).
Here is the results :
– Noise floor : 34dBA
– With original Sony fans: 47.4dBA
– With new SilenX fans: 39.4dBA
Overall noise Gain : 8dBA not that bad
That’s it! The fans should all run fine when the unit is powered up. The big difference being how G70 is now even quieter than before. Enjoy!
John
Filed Under Guides | Questions & Comments |
Comments & Questions
If you would like to make a comment, or ask me a question, please fill out the form below.
If you want a personalized image to appear with your comment you need a Gravatar.
Sign up for a Gravatar today. It's free and easy