
Scanlines Photoshop Tutorial
Creating scanlines is one of the easist things to do in Photoshop. And once you have made the pattern you can use it over and over in other images. On with the tutorial.
First you need to create a one pixel by one pixel image.
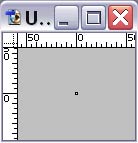
Next zoom way into the image so you can see what you are doing. Or just hit Ctrl+0 (zero) to zoom the image to fit the screen.
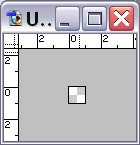
Fill the image with white.
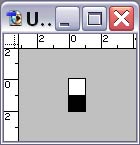
Now expand the canvas size to two pixels high. To do this go to Image/Canvas Size.
Now fill the new part of your canvas with black. Just use the paint bucket and put it over the new part of your canvas and click.
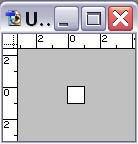
You have now completed your pattern that you will use for the scanlines. Lets put it to work. Hit Ctrl+A to select the entire picture (or hit ctrl and left click the layer in the layers palette). With the image selected, go to Edit and choose Define Pattern. It will prompt you to name this new pattern, name it “scanline” and it will now be saved in Photoshop for future use. Now lets do something with it.
Let’s go ahead and apply it to an image. I am going to use this picture of my car. You can use whatever picture you would like though.

So open up the picture that you want to apply the scan lines to, and add an additional layer on top of it. Working on the newly created layer, go to Edit/Fill and on the menu that pops up, under contents from the drop down menu choose pattern. Below this you will see another drop down menu next to the words Custom Pattern, hit the little arrow and choose your newly created pattern (It should be the last one).

Now you will notice that the pattern is completely covering your image. Easy to fix though. In your layers Palette set the layers blending mode to Multiply (setting a layers mode to “Multiply” in Photoshop hides all the white areas of the image). And you now have scanlines over your image.

These scanlines are a little too harsh though. To soften it up a little bit, just set the layers opacity to around 50%. It is all just that simple. In the future whenever you want to re-use this effect Photoshop should have saved your pattern, so you can just choose it as a pattern whenever you choose to fill something with a pattern.

Instead of setting the layers mode to Multiply, you can set it to Screen to give you white scanlines.
You can also try using different colors as well.
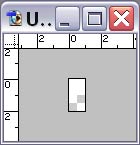
To make vertical scanlines, just rotate the image that you defined as the pattern 90 degrees and define that as a pattern.
If you have any questions or comments concerning this Photoshop Tutorial please let me know by filling out the form below.
Filed Under Tutorials | 6 Questions/Comments |
Comments & Questions
If you would like to make a comment, or ask me a question, please fill out the form below.
If you want a personalized image to appear with your comment you need a Gravatar.
Sign up for a Gravatar today. It's free and easy
January 12, 2010 1:23 PM
Great tip as it was very handy in putting the finishing touches on a project at work. Thanks!
January 25, 2010 12:02 PM
Nice NB. Hard Doc Hard Core?
January 25, 2010 12:42 PM
Nope, it’s the sport
May 18, 2010 12:45 PM
Thanks a lot. I needed this…
July 15, 2010 8:56 AM
excelent!!!
very easy!! thanks