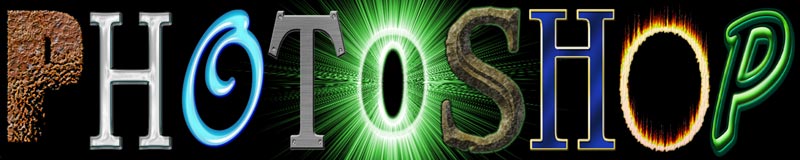
Liquid Text Photoshop Tutorial
In this Photoshop tutorial I am going to teach you how to create liquid text. Liquid text created in Photoshop looks super cool and it is surprisingly easy to do. So why don’t we get started?
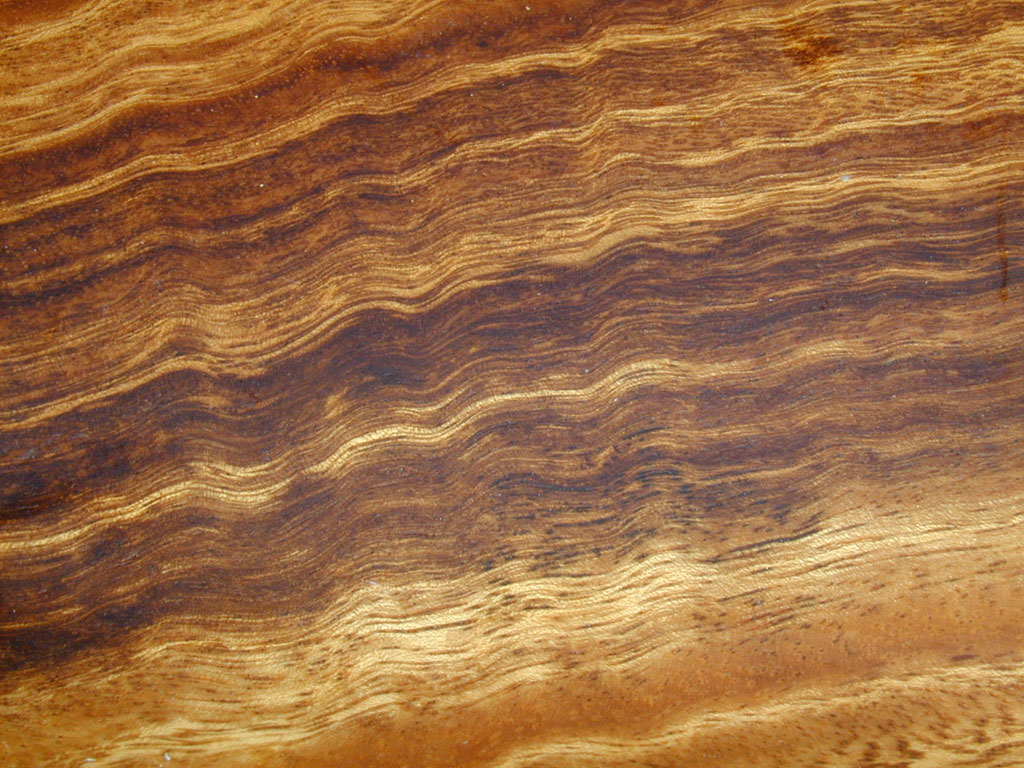
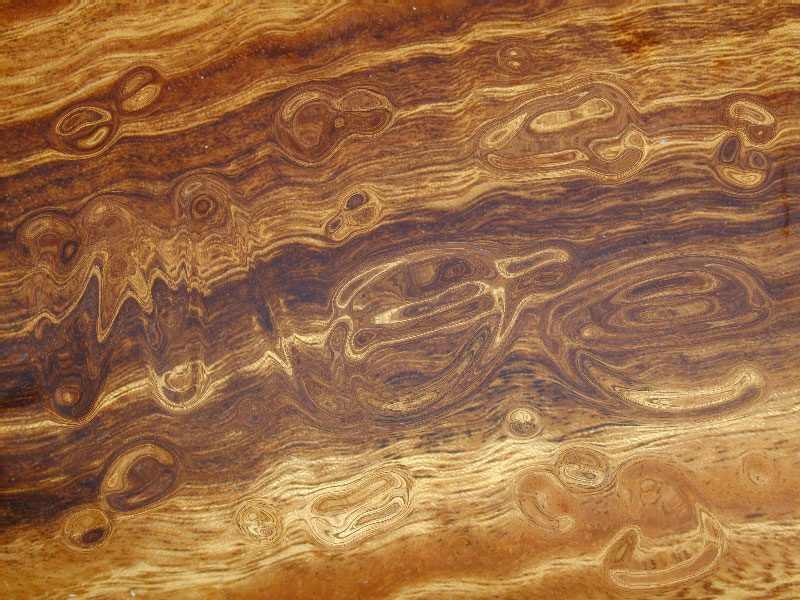
First of all we need to find an image that we are going to put our liquid text on. You want something with some pattern on it so that the liquid that you create can distort it. I used the wood grain image below (click for a much bigger version).
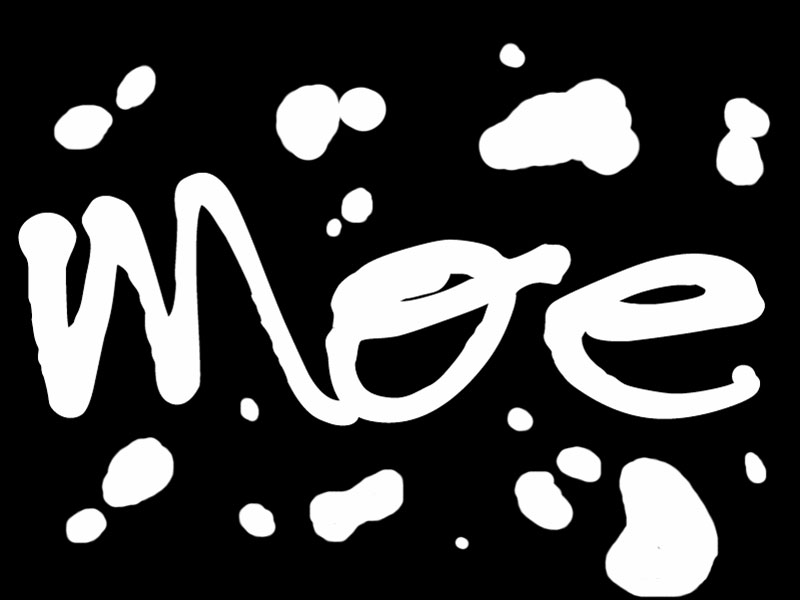
Once you have your background image loaded up switch over to your channels palette and create a new channel. In this newly created channel you need to create your text. I used a font called Tree Frog, try and find something that is kind of liquidy looking. In this channel I also added a few water droplets to spice things up a bit. This is what my finished channel looks like.
Now we need to create the displacement map that we are going to use when we run the glass filter in a few steps. Duplicated the channel that you created in the last step. Once you have the channel duplicated we need to blur it a bit. Go to Filters/Blur/Gaussian Blur, I used a value of 7 for the blur. The resulting channel should look like this.

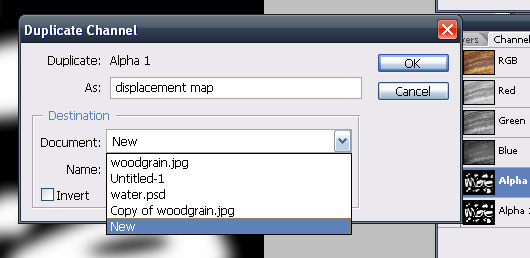
The glass filter, which we are about to use, requires a separate image to be used we need to duplicate this channel and save it as a standalone image. To do this click the little arrow on top of the channels window and from the menu that drops down choose “Duplicate Channel”. After you click duplicate channel another window will popup. From this window that pops up from the drop down menu choose new and press ok. The image you created in the channel will now popup in it’s own window. Save the image that pops up as a PSD file, it doesn’t matter where but remember what you called it so that you can find it later. I named mine displacementmap.psd.

Switch back to the original image. Go back to your layers palette and duplicate your background image. In your layers palette you should now have a layer called background and one called background copy. Now lets break out the glass filter. The glass filter can be found by going to Filter/Distort/Glass. When you choose glass a new screen will popup, on this screen you need to load your displacementmap.psd as the texture. Press the little arrow next to the drop down menu and choose load and browse to wherever it was that you saved your image in the previous step. Fiddle with the Distortion and smoothness levels to taste. I used a Distortion level of 10 and a Smoothness level of 4, keep scaling at 100%. Your image should now look like this (click for bigger). Rename this layer, which is currently called “background copy” to “Glassy”.
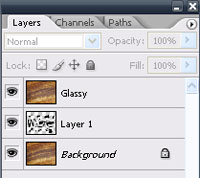
Now we need the original, unblurred copy of our text in the layers palette. To do this go back to your channels palette and ctrl-click the unblurred image which has your text and water drops on it to choose its selection. Go back to your layers palette, create a new layer between the background layer and the Glassy layer, and with the selection still active fill the selection with black. Your layers palette should now look like the image below.
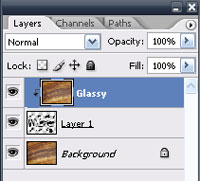
We need to join the text layer with the glass layer. To do this right click the Glassy layer and choose “Create Clipping Mask”. Your layers palette should now look like this.
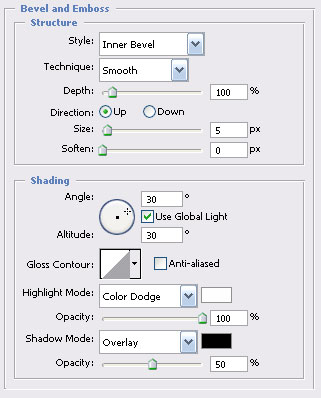
Now lets have some fun and really make this pop. We are going to be doing a few different layer styles. Select the layer that has your text on it (the middle layer) and open up your layer styles window, lets start with bevel and emboss (Layer/Layer Style/Bevel and Emboss).
For bevel and emboss I used the following settings:
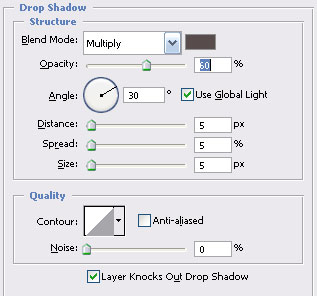
Now lets add a drop shadow. I used the following settings, for color, click around your background image until you find a color that you like.
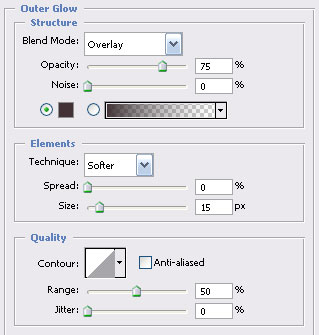
Next, lets add a bit of an outer glow to really make things stand out. Once again, here are the settings that I used.
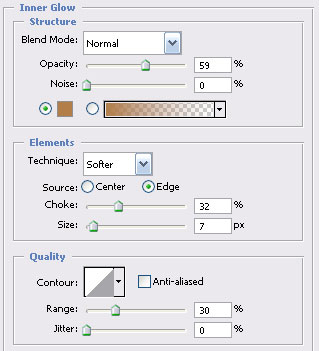
And finally lets add a bit of an inner glow.
With all of the above layer styles feel free to experiment and try different things, there is no set way to do this, just play with the settings until you achieve a look that you like.
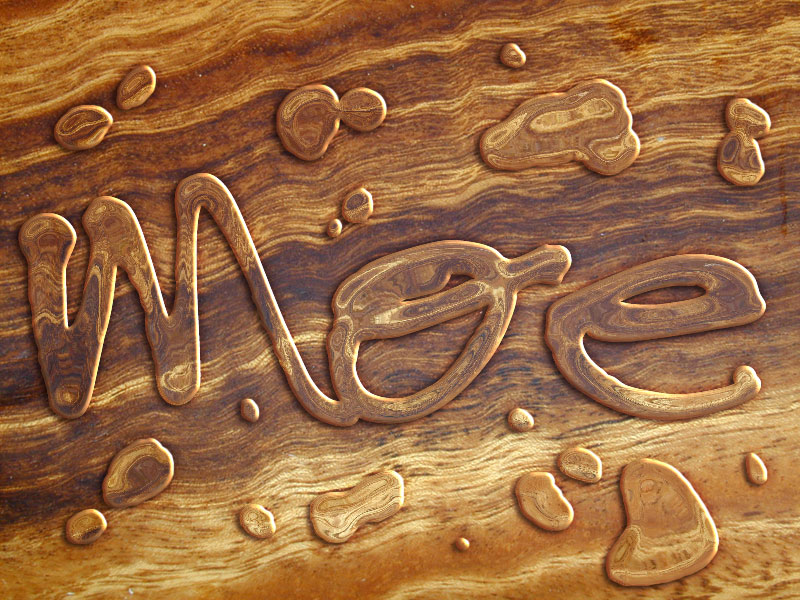
Here is the final result. Make sure you click the image on the right to see the full size version. Pretty nice huh?
Any questions, comments or feedback please fill out the form below.
Check out the comments below to see how you can make the water look oily.
Filed Under Tutorials | 107 Questions/Comments |
Comments & Questions
If you would like to make a comment, or ask me a question, please fill out the form below.
If you want a personalized image to appear with your comment you need a Gravatar.
Sign up for a Gravatar today. It's free and easy
October 20, 2011 2:06 PM
Sketch, I am afraid that I am at a loss as to why you cannot choose the glass filter. My best guess would be you missed some step along the way but I really don’t know. I am also using CS5 64bit and I just ran through the tutorial with no problems.
October 21, 2011 2:25 AM
Well, that’s a bummer. 8( I don’t think I missed a step, but I’ll redo everything when I have time and try again. I have a feeling it has something to do w/the converting of my image mode. I had it on grayscale before I changed it to RGB. Thank you for time Moe and Hopefully I’ll be able to do it soon! lol :]
February 12, 2012 7:44 AM
Thank you. I got stuck in step 4 but with a little more concentration I did it. Hats of for you man.
March 19, 2012 11:47 AM
I am having trouble with this tutorial.
Everything is fine until I get to this part
Now we need the original, unblurred copy of our text in the layers palette. To do this go back to your channels palette and ctrl-click the unblurred image which has your text and water drops on it to choose its selection. Go back to your layers palette, create a new layer between the background layer and the Glassy layer, and with the selection still active fill the selection with black. Your layers palette should now look like the image below.
I go to the channels tab/palette and ctrl + click on the unblurred text and then go back to my layers palette, create a new layer and the new layer is blank.
September 16, 2025 8:23 AM
Great read on post. Reminds me of something I read on my site:
gbetssa.co.za.
What do you think?
April 21, 2026 2:08 PM
With WeGame Platform, clients get
customizable
websites that
support various payment methods
and
offer quick and safe top-ups.
This makes it easier for users to
buy game credits
for
popular mobile and online game