
Engraving Photoshop Tutorial
In this Photoshop tutorial I am going to show you how to achieve a look of a design or text that has been engraved or chiseled into stone or any other material that you would like. It’s actually a quite easy effect to achieve.
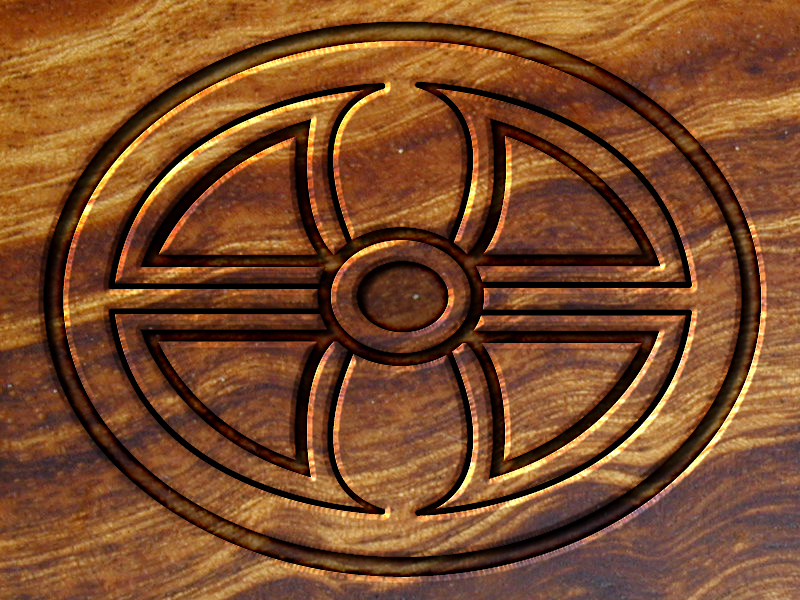
To start off with you are going to need two things. You will need the material that you would like to engrave and you will need the design that you want to engrave, this design can easily be text instead of a design. I will be using the following images. The image on the left is the material I will be engraving and the image on the right is the design I will be engraving. (click for bigger)

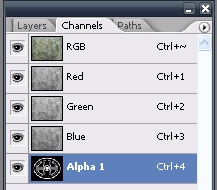
Open up the material you chose in Photoshop, in my case the green marble pictured above. Now go to your channels palette and add your design or text into a new channel. If you are using a design you have already created, simply open up your design, copy it, then paste it into a new channel. If you have not made a design, create a new channel and simple make your design directly in the newly created channel. If you are working with text simply write your text in the newly created channel. Your channels palette should now look something like this.
Now we are going to be working with Adjustment Layers and we need to make a layer mask with the design or text that we put in our newly created channel. To do this load the newly created channel as a selection by holding down CTRL and clicking the newly created channel. Now go back to your layers palette the “Create new fill or adjustment layer” button. This will pop-up a list, from the list choose levels as the type. In the levels dialog box that pops up move the white output levels slider inward to darken the image. Doing so here will darken just the part that we are going to engrave without increasing the contrast in the rest of the image.

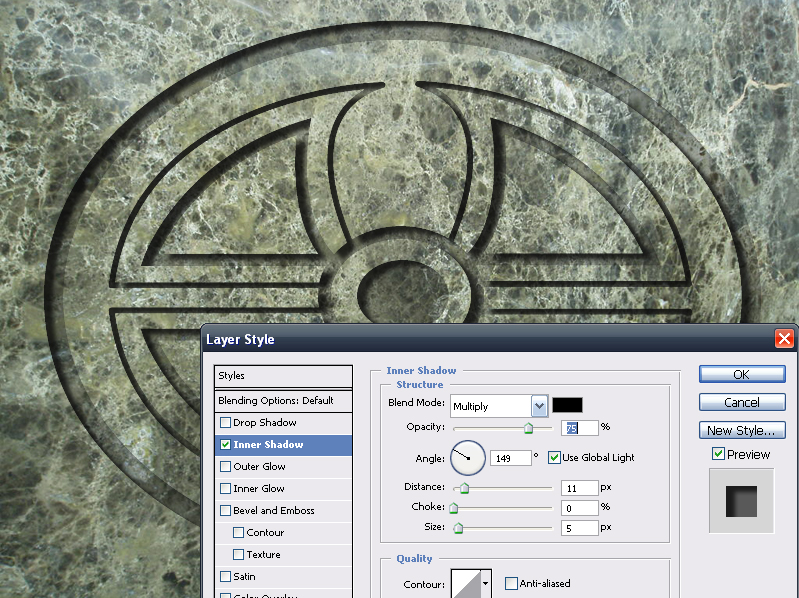
The rest of the work that we will be doing will take place on the adjustment layer that we just created so make sure you are working on it. Lets get started with what will have the biggest effect on the image, an inner shadow. Open up your Layers Styles (Layer/Layer Style/Inner Shadow), the settings here are purely by taste. Use your mouse cursor to drag around the shadow until you achieve a look that you like. Don’t hit ok when you are done though, we aren’t done with the layer styles quite yet.
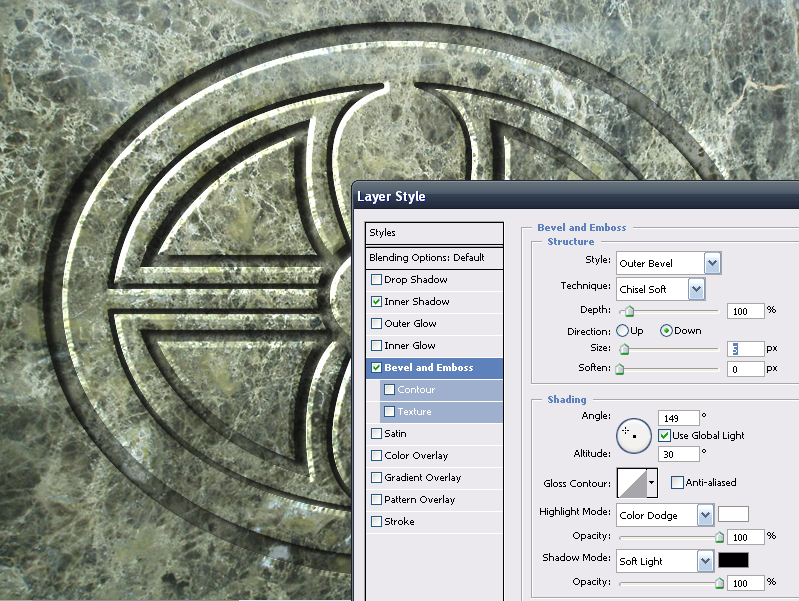
Now lets create a nice beveled edge. Again, these settings are kind of to taste. I chose an Outer Bevel. I chose to really pump up the intensity for both the highlights and the shadow, moving them all the way up to 100%, I also changed their blending mode as well. You can see the settings I used in the picture below.
To enhance the carving lets enhance the shadow. I used the inner glow layer style to do this. Make your inner shadow color black and change the color mode to Color Burn. Also lower the opacity and increase the size. You can see the settings I used below.

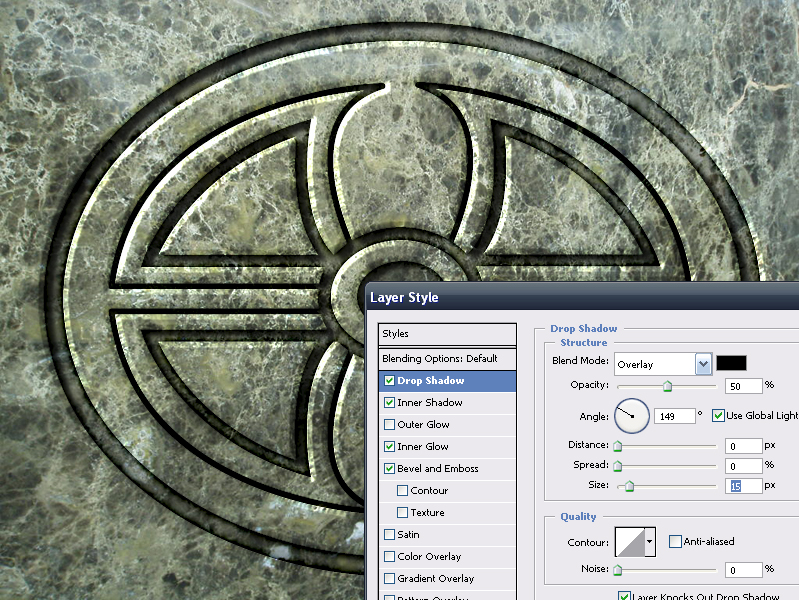
To enhance the shadow a bit more I added a drop shadow as well. This will help to help to define the shading. I put the drop shadow in overlay mode, used a fairly good sized “Size” setting and made the distance zero. Again, see my settings below.
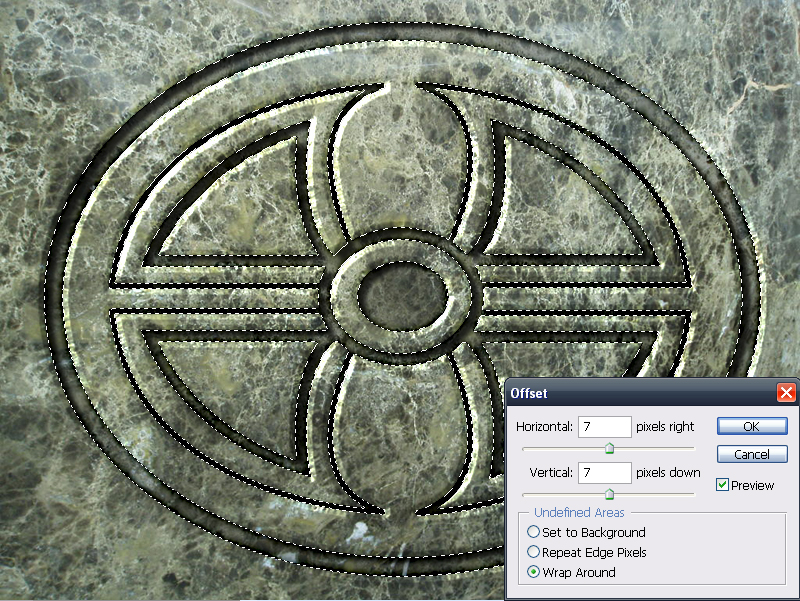
To help with the illusion of depth we can shift the image in the engraved out areas. To do this, select the background image and then CTRL click the adjustment layer to load it’s selection and then go to your offset filter (Filters/Other/Offset). You just want to shift this a bit so that the patterns don’t match up so use a small value, I used 7 for both the horizontal and the vertical.
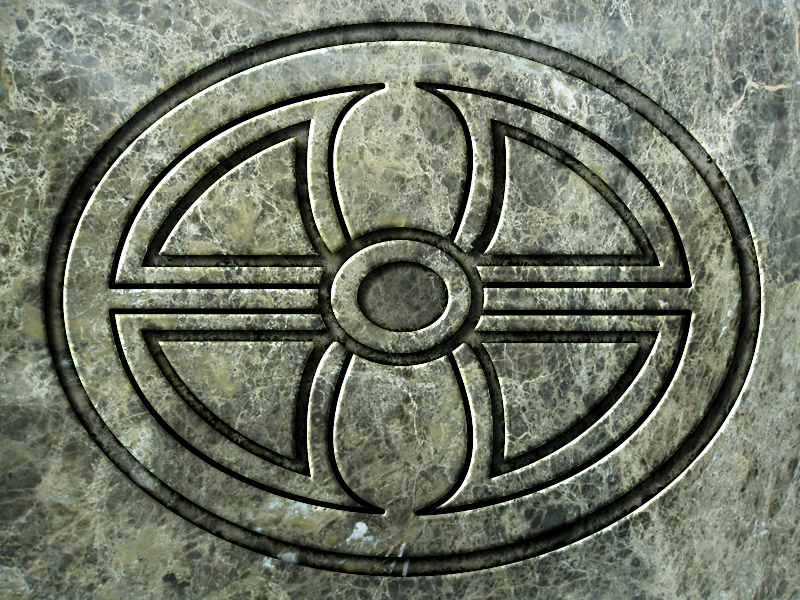
And here is the final result.
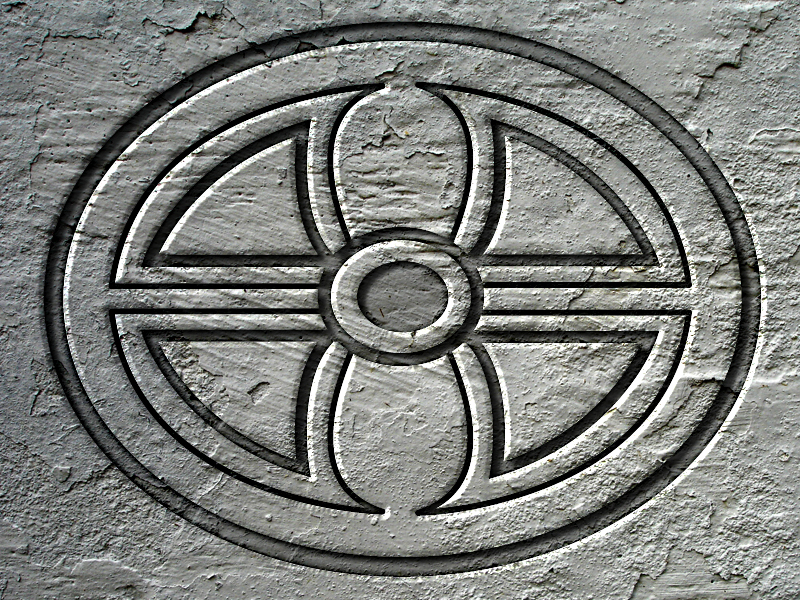
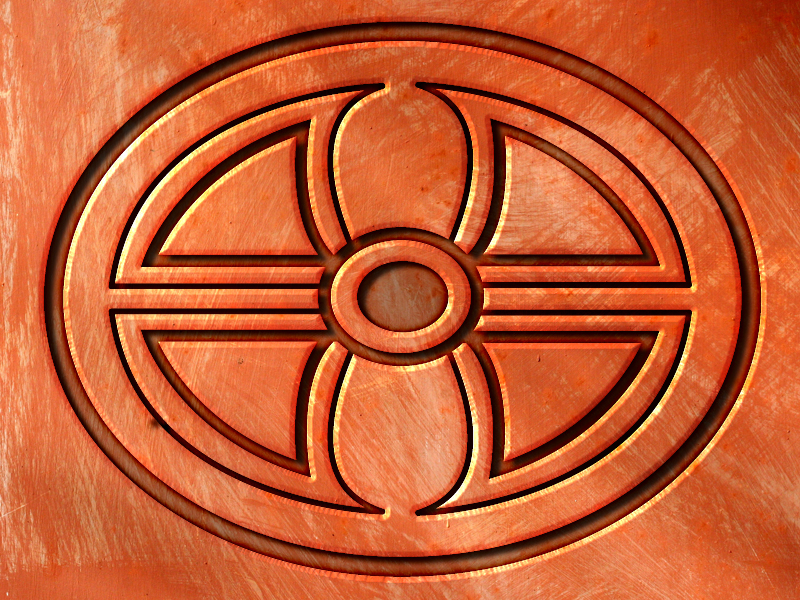
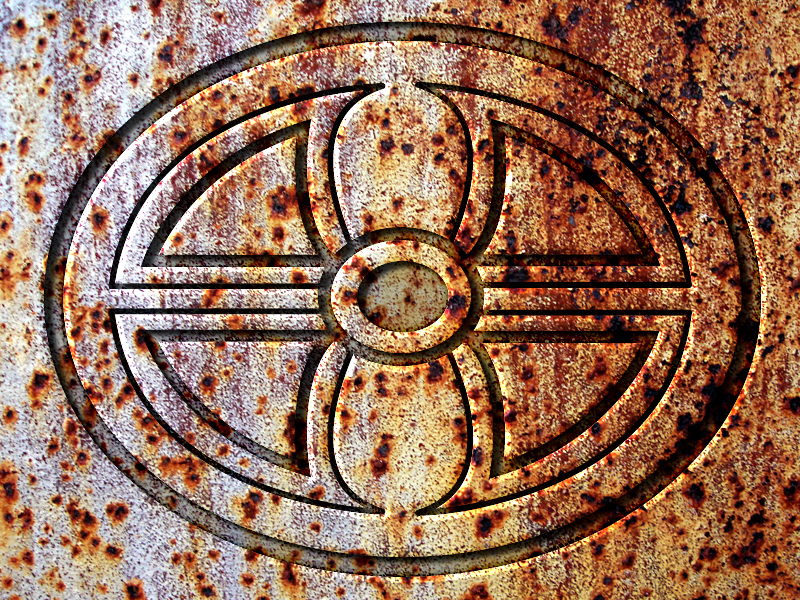
That about covers engraving. One really cool thing about this is since you did almost all the of the changes in the adjustment layer that all you have to do is drag a new texture layer into the image and then repeat the last offset step and the effects will be added to the new layer. Here are a few examples:

Filed Under Tutorials | 43 Questions/Comments |
Comments & Questions
If you would like to make a comment, or ask me a question, please fill out the form below.
If you want a personalized image to appear with your comment you need a Gravatar.
Sign up for a Gravatar today. It's free and easy
October 9, 2009 1:04 PM
Engraving photoshop tutorial.
Would you please be kind and explain me how do you put the second design of the engraving in the alpha channels palette.
When I open the design in photoshop the marble disappears.
Thank you and have a nice day.
Albert
October 9, 2009 1:15 PM
If I understand what happened to you is that when you switched to the channels palette the marble will disappear, when you go back to the layers palette, it will still be there.
October 14, 2009 9:46 AM
I’ve never been good with masking… everything outside of my design (black and white like displayed) turns pink with all of the channel levels on.
October 14, 2009 9:51 AM
Nevermind… figured it out.
October 14, 2009 11:05 AM
And thank you for the tutorial.
October 14, 2009 11:24 AM
No problem, glad you got it figured out.
December 10, 2009 12:23 PM
Hey Moe!
Is the Control click command the same on the mac? I’m not sure if anything is happening when I control click my adjustment layer.
December 10, 2009 12:34 PM
Laurie Montgomery, I don’t have any experience with Macs but I believe its command click on Macs.
January 24, 2010 3:31 PM
Hello Moe,
Coul you help me please. The problem is when I try to get Alpha 1 of some text to engrave my Alpha 1 is totally black, what I’m doing wrong? Tutorial is really great!
Best regards,
NeveN
January 24, 2010 4:47 PM
Are you using black as your font color?
January 25, 2010 3:12 AM
Hello Moe,
I’m using white text on a black background in jpeg format.
Thanks for helping.
Very best,
NeveN
January 25, 2010 12:41 PM
Are you trying to put the text directly in the channels palette or are you trying to import it from a jpg?
You should be able to just start a new channel, which will automatically be named “Alpha 1” and write your text directly in the newly created channel.
January 25, 2010 1:31 PM
Thanks Moe I’ll do it. I wish you very best and thanks for help!
NeveN
February 22, 2010 12:59 AM
can u do this w/ a real photo and not an animation?
February 22, 2010 1:03 AM
An animation? There is nothing animated in this tutorial. But yes, you can do it on anything you’d like, the texture in this tutorial is a photograph.
March 16, 2010 2:01 AM
How would you recommend scratching up the etching. This is nice and clean, and I want to try and make it rougher. Like freshly chiseled effect
March 16, 2010 10:23 AM
Xavier, you could try on the Bevel and Emboss stage to set the Technique to Chisel Hard and maybe try fiddling with the Gloss Contour.
April 17, 2010 5:15 AM
Very nice. So much helping
April 20, 2010 4:11 PM
Hi Moe,
I was wondering how to import an illustration I did in Illustrator to the Photoshop channel. When I try to paste it asks for pixels or path, which should I use?
Thanks!
April 20, 2010 4:17 PM
Jessica, I don’t know the answer to your question, Illustrator is not my strong point. You should be able to just save it in illustrator as a jpg or png and import that though.
September 29, 2010 5:14 AM
Nice tut Moe.
Dear Jessica, for the purpous of this tutorial (CS3 or later):
1. If you are using vector graphic from illustrator make sure it uses only black color
2. copy/paste your graphic to photoshop as smart object
3. disable all layers except your new smart object layer
4. now the best part – go to channels panel and chose one of the layers (if your graphic uses only black RGB color, it doesn’t matter wich channel you chose) then drag&drop the channel on a “create new channel” button (now you should have new channel with your graphic)
5. disable all channels except all RGB and go back to layers pannel
6. you can now delete/hide smart vector layer
6. turn your other layers visible and go on with tutorial
🙂
Regards.
October 18, 2010 6:50 PM
Thanks SO MUCH for the tutorial! I have been using it for days now completing a project-putting engraved text on a blank tombstone for an advertisement. However, I can’t figure out how to edit the text on the channels tab after I’ve created it. I follow all of the steps above, but when I create the text box on the channel’s tab, the background is red so I can’t tell what size I should make the text to fit on the tombstone background picture until I’ve already gone back to the layers tab and “created a new fill or adjustment layer”. At that point, if I want to go back and adjust the text, it won’t let me. If you could help, I would be grateful!
November 28, 2010 9:58 AM
Hey, Thanks for nice tutorial. I am facing problems with shadowing and beveling. The problem is whenever I try to make an engraved text it turns out to an embossed text. I mean it floated out from the background and looks like a 3d metallic text?
Please, some tips on those shadowing and beveling technique.
Thanks.
July 15, 2011 6:46 AM
Thanks a lot for your tutorial. Its been a great help…
July 15, 2011 9:45 AM
Sorry but this is just horribly explained.
July 15, 2011 11:15 AM
Sorry you feel that way Jessi.
July 17, 2011 5:18 AM
very nice work thanks for this tutorials.
September 23, 2011 8:16 PM
Hey Moe,
Great tutorial. I’m just getting started in web design, and tutorials like yours make this new career a little easier. Thanks again!
October 5, 2011 7:30 AM
Thank you so much for this tutorial. I’ve never done channels and adjustment layers and your tutorial helped hugely!
October 5, 2011 8:07 PM
This is definitely the best engraving tutorials on the web. I wanted to learn engraving in Photoshop, but after each tutorial, what I did was to search for another tutorial. However, this one completely brought me on the road.
Thanks.
November 8, 2011 5:12 PM
I really want to understand this tutorial… It has some really great advanced information, but I can’t figure out some of the basics that are not explained. The new channel step is not explained in enough detail, in that there are several options in this step that are compeltely skipped over. I am attempting to use simple text to obtain this look, not an image. In an attempt to understand, I downloaded the image you have used, but when I create a new channel, it appears completely opposite of how yours look. The opposite portions are shaded, and I can’t figure out how to overcome this…I am trying to learn photoshop, but I guess I do not even know the basics to complete, what otherwise, seems to be a simple task.
November 8, 2011 5:17 PM
To expound on questions about new channel, when creating a new channel these are the options:
1. Color indicates: Masked Areas or Selected areas?
2. Color?
3. Opacity?
None of this is explained in the tutorial.
February 1, 2012 3:44 PM
Hi, I was trying to follow your “Engraving Photoshop Tutorial,” but can’t quite figure it out. I’m trying out CS5 on W7. I’m totaly new to photoshop. I load a texture that i like into photoshop, but i don’t know how to get a design loaded, or opened as you put it, and into the alpha channel. When I try opening the design from the files menu, it just replaces the texture image I just loaded. Not sure what to do. I need help here. Thanks much.
February 2, 2012 12:23 PM
Tim, as it says in the instructions above. Open your texture file. Open your design. Photoshop has tabs so you should now have both images open. select the entire canvas of your texture file and copy it. Go to your texture file, open the channels palette and paste in your design.
If you’re new to Photoshop you may want to start off with some easier tutorials until you get a better grasp of where stuff is in Photoshop.
If you’re brand new to Photoshop I highly recommend the Adobe Photoshop CS5 Classroom in a Book. I used an earlier version of this book when I first got started and found it invaluable.
Good luck.
August 17, 2012 7:30 PM
I have been working with Photoshop for almost 20 years now and I don’t know what you mean when you say to paste something into the channels palette. You have to explain that step in a little more detail. Don’t get me wrong, it looks like you have put a lot of thought and effort into this tutorial, but it does leave a lot out and the grammar is a little hard to understand.
August 20, 2012 12:06 PM
Martin, after 20 years of using Photoshop I am not sure why you even need this tutorial. What don’t you understand? What a channels palette is or how to paste something? Both are very basic Photoshop things.
August 26, 2012 12:40 AM
Thank you for all of your tutorials they are well written and have great results.
September 23, 2012 4:18 AM
Yeah this looks great, but for some reason I am not understanding what is meant with: “To do this load the newly created channel as a selection by holding down CTRL and clicking the newly created channel. Now go back to your layers palette the “Create new fill or adjustment layer” button.”
I understand you are probably using a PC and I am using a Mac, however can you explain this step in laymans terms….cos i cant get it to work no matter what.
cheers
September 25, 2012 4:04 PM
I believe that on a Mac you use the command key instead of the control key.
March 1, 2013 12:09 PM
Thanks so much for this tutorial. I vaguely knew how to do an engraved look, but this one is so much better than what I’ve been doing.
I don’t know what everyone is talking about with it being hard to follow. It’s super easy and I got it in about 15 minutes. Very useful for my job! Thanks so much.
April 7, 2014 7:46 PM
GREAT tutorial! saved me a lot of work, and the best tutorial on engraving in rock that I’ve found. Thanks!
December 17, 2014 1:37 PM
I’m having trouble. . .and will be willing to donate if you can help me (complete the process)by deeply engraving my logo into a rock. . .can u help me, aloha!