Case: Accent HT200S
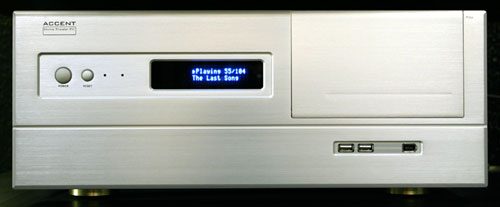
When it came time to pick out a case for my HTPC I knew that I wanted something that looked really nice since it was going to be proudly displayed in my rack. There are a couple of companies out there making high quality HTPC cases and the selection just keeps on getting better. The prices range from inexpensive to down right expensive. My case kind of falls in the middle price wise. I spoiled myself a bit when I bought the case, it was more than I really wanted to spend but I liked the case so much I couldn’t resist. The case I ended up getting was the Accent HT200S which I purchased from Digital Connection.
There are couple schools of thought on how to choose a case for your HTPC. One is to buy a nice looking case and keep it with the rest of your equipment. The second is to use any case you want and then stick the HTPC in a closet or somewhere out of the way. They both have there advantages and disadvantages. Having the case with the rest of your components makes wiring everything up, putting in a DVD, changing a CD, etc all the more easy since your HTPC is with the rest of your equipment. Keeping the HTPC on your rack also means you have to battle noise which is the biggest drawback. By sticking the HTPC in a closet or somewhere else you don’t have to worry about noise at all and you can use a cheap case. Of course if the HTPC is away from all your other equipment then you have to deal with long wire runs, going to where ever the computer is when you want to put a movie or cd in. I opted for option one. I like having everything in the same place and it just made more sense for me and the situation that I have to deal with. It is pretty easy to deal with the noise issue if you take certain precautions and use quality equpment.
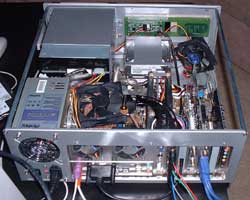
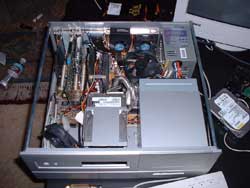
Installing all the equipment in the Accent case was pretty straight forward and not too hard. The only part that is a bit of a pain is getting the drives in. There are drive cages for both the hard drives and the optical drives which have to be removed to install the drives. This normally wouldn’t be a big deal but the screws are in bit of difficult location to get to which can make removal and re-installation a bit of a pain. Other than that small issue I had no problems putting the machine together. The case had no sharp edges to cut yourself on and is generally well laid out. The case is full ATX sized so you are not limited in PCI slots or motherboard choice and the case also features front USB and Firewire ports. The case has room for two 5.25″ drives and two 3.5″ drives as well. The 5.25″ are external and the 3.5″ are internal, so if you want to install a floppy drive you will to use a 5.25″ to 3.5″ adapter, I chose to not install a floppy.
The case has two 60mm fan openings in the rear of the case, I have placed two Vantec stealth fans in there which I talk about on my core components page. I also jury rigged an additional 80mm fan which I have placed near the front of the case. I have no problems with temperatures in my case at all, it is very stable and never runs hot.
The case also comes with a two line VFD display. It’s a nice little bonus feature but getting it to display what you want can be a major ordeal. I use Girder to drive my VFD. I have it setup so that when the computer is idle it displays the date and time. When I am watching a movie it tells me what chapter I am on and displays the running time and total time of the movie. When I am listening to mp3s it displays the song title and the track number. Overall it’s kind of cool to have the VFD and it makes the case look nice but I rarely look at it and if I were to ever get a different case I wouldn’t hesitate to get a case without one. They are cool but definitely not needed.
Filed Under Hardware | Questions & Comments |
Comments & Questions
If you would like to make a comment, or ask me a question, please fill out the form below.
If you want a personalized image to appear with your comment you need a Gravatar.
Sign up for a Gravatar today. It's free and easy


