Overlapping Text Photoshop Tutorial
In this Photoshop tutorial I will show you how to make text that overlaps itself. It is a very simple tutorial but gives a great effect. This tutorial can be used on any sort of text that you make, you don’t have to use the same style font that I use or have the letters look the same as mine, but I will also show you some cool things you can do with layer styles to make some cool looking letters. I will point out where the important steps are to achieve the overlapping effect.
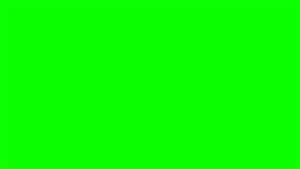 Lets begin. Fire up Photoshop and open up a new document, doesn’t really matter on the size, but you want it big enough so you can really see what is going on. I tend to work big, you can always shrink the text down when you are done. If you want to follow along exactly like me, start with your canvas 800X450. Pick a background color, this isn’t at all important and can be changed at any time. I am going to use a bright green color which is R:12 G:255 B:0 during the tutorial.
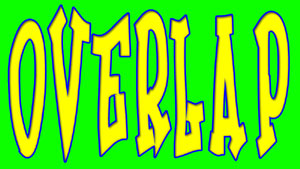
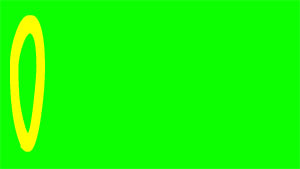 Now in order to make this effect work, each of your letters has to be on a separate layer. This kinda makes everything a pain in the butt, but it is the only way to do it. Break out the text tool (keyboard shortcut is “T”) and then choose your font, I like to use a playful font for this effect, I am going to use a font called “Frosty”. Choose the color that you want to use for the font, I am going to use yellow (R:255 G:255 B:0). With a font size of 140. Now just type the first letter of the word you want to spell out. I am going to spell out overlap so I am made an “O”.
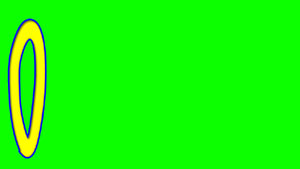 Now I am going to apply some layer styles, the import one being Stroke. The stroked edge is what makes the effect really visible. Working on the text layer, go to Layer/Layer Style/Stroke. In the window that pops up choose your colors and the width of the stroke. In my example I am using these settings; Size: 4, Position: Outside, Blend: Normal, Opacity: 100% and I am using Blue (R:0 G:0 B:255) for the color. I also applied an inner shadow and bevel and emboss layer effect to my text just to make it look a little cooler.
 Now just spell out the rest of your word make sure to put each new letter on its own layer, this is very important. Don’t forget that you can copy and paste your layer styles to each new letter which will save you lots of time. To do this type your second letter, making sure it is on its own layer, and use the same color that you did for the first letter. Don’t worry about placement of the letters yet either. Once you have your new letter go to your layers palette and right click the first letter that you made and from the pop-up menu choose “Copy Layer Style”. Now go to the new layer that was created when you made your second letter and right click it and choose “Paste Layer Style” and all the effects you used on your first letter will be applied to your second letter. Follow these steps until you have all of the letters that make up your word, again make sure that each letter is on its own layer.
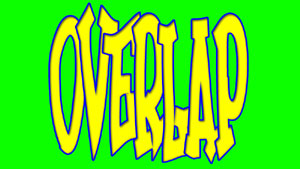 OK, now you should have all your letters, each on there own layer, with the same layer styles applied to each. Now it is just about moving the letters around so that they overlap each other and then changing up the layer order. Get your move tool, keyboard shortcut “V”, and choose one of your letters. I like to work left to right, so I am going to choose the “V”. Move it over so that it just partially covers the first letter, the “O” for me. Then continue working your way through your letters until you have something that looks pretty good. We will improve the effect in the next step.
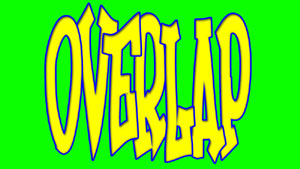 With the way it is now, it looks pretty good but we can take it a step further. Due to the way layers work, each letter as you go in the word is on top of the one that it follow. So the first letter is on the bottom and the last one is on the top. In Photoshop you can drag layers up and down changing their order. For instance in the above picture the “V” is over the “O” but if I take the “O” layer and drag it above the “V” layer the “O” will now be on top of the V. So play around by dragging the letters so that they sit in above or below the letters next to them. And since the layers are on separate layers you can also move them using the move tool. Thats it, pretty simple huh? The finished product is on the right. I hope you have enjoyed this Photoshop tutorial, if you have any questions please fill out the form below.
Filed Under Tutorials | 1 Question/Comment |
Comments & Questions
If you would like to make a comment, or ask me a question, please fill out the form below.
If you want a personalized image to appear with your comment you need a Gravatar.
Sign up for a Gravatar today. It's free and easy
October 21, 2011 9:35 AM
Hey, you’re hell of guy, i’ve been doing outlines in letters and images fr a long time in a different and very hard way until i’ve red your post. and now im doing itas easy as ABC. you’re the best! thanks a lot for your post.