Aqua Button Photoshop Tutorial
The aqua button is one of the nicest looking buttons that you can make in Photoshop and in this tutorial I will show you how to make one. They are fairly easy to make there are just quite a few steps. The end result is worth it though. Let’s get started shall well.
First off lets open up a new image, lets just say 500X250 pixels but the size isn’t overly important. I do find it easier to work bigger than needed and then shrinking down the button once you are done. Create a new layer above your background layer and fill up the new layer with a background pattern of some sort, I used a grid pattern. Finally set the opacity of the pattern layer to 15%. Your image should now look like this.
Next, create a new channel. In this new channel create a pill shaped button. I do this by creating two circles and then a rectangle between the two circles to create the pill shaped button. Make the button fairly large spanning the majority of the image horizontally.

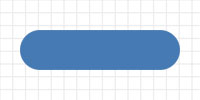
Now create a selection from your newly created channel and go back to your layers palette. Once you are back in the layers palette create a new layer and fill in your newly created pill shaped selection with a nice blue color. I used R:70 G:122 B:179 / Hex: 467ab3. Your image should now look like this.
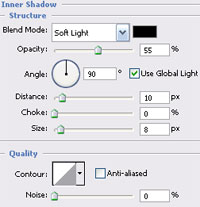
Now we are going to be doing some work with Layer Styles. Still working with the newly created blue pill shaped layer open up your layer styles and choose Inner Shadow (Layer/Layer Style/Inner Shadow). I used the settings below (click for bigger).
After you are done with the Inner Shadow, don’t click OK, we aren’t done with the Layer Styles yet.
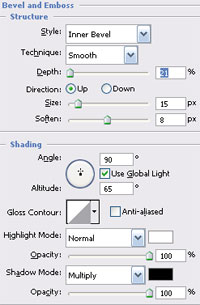
After applying the inner shadow choose the Bevel and Emboss layer style and apply the settings below. Once again, click for bigger
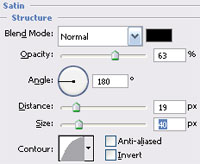
Still not done with the layer styles. This time choose satin. I used the settings below. Again, click for bigger.
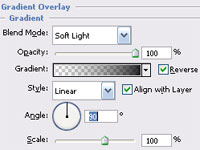
Alright, last layer style. This time choose Gradient Overlay and use the settings shown below.
OK, still working on the blue pill layer load the selection of the layer and then contract it (Select/Modify/Contract). Contract by 10 pixels and then do another contraction of 10. Once the selection has been contracted twice, feather the selection (Select/Feather) with a value of 10. Your image should now look like this.
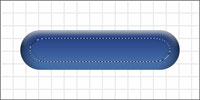
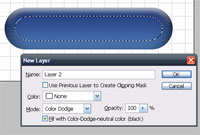
Now Alt Click the new layer button which will pop up a window. We are going to create a new Color Dodge layer with “Color-Dodge-Neutral color (black)” checked (see the picture on the right for reference). Fill this newly created layer with white using the paint bucket.
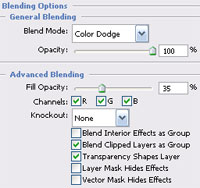
Double click the newly created layer to bring up the blending options screen and apply the following settings.
Still working with the Color Dodge layer, apply a Gaussian Blur, I used a value of 18. Your image should now be looking like this.
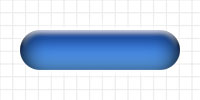
Load the selection from the blue pill layer and then click then create a new layer mask by pressing the button at the bottom of the Layers palette. Re-select the Blue Pill layers selection by Ctrl clicking the layer. Now repeat what we did in step nine, Contract the selection by 10 twice and then feather it by 10. Now fill the selection with the following gray color R:166 G:166 B:166 / Hex: A6A6A6. Then apply a Gaussian blur to the layer mask using a value of 20. Your image should now look like this.
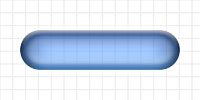
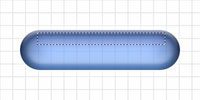
Lets add some highlights. Grab your rectangle marquee selection tool and create a rectangle as shown in the picture below.
Using the rectangle selection you just made go to your channels palette and save the selection as a new channel. Select this newly created channel and lets skew it. Choose the Skew tool (Edit/Transform/Skew) and while holding down Ctrl+Shift+Alt (this will keep things symmetrical) skew the rectangle so that it looks like the image below.
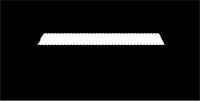
Remove your selection and apply a gaussian blur to your skewed rectangle. I used a value of 10.
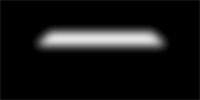
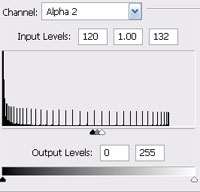
Still working in the channels palette open up your Levels Adjustment tool (Image/Adjustments/Levels) and set the input levels values to 120, 1, 132. This will define your blurred shape. Press OK and then load the selection from your newly created shape.
With the selection still active go back to your layers palette and create a new layer on top of all the existing layers. Reset your colors to the default black and white (press D) and choose your Gradient Tool. Make a linear gradient from the bottom of the selection to the top.
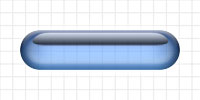
Set this newly created layers mode to Screen and set the opacity to 60%
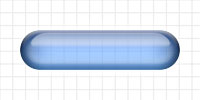
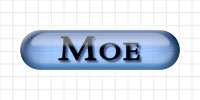
If you’d like, add some text with a drop shadow and that is all. Looks pretty nice huh? I added the text to the layer right above the blue pill layer so that the highlights would effect the letters. The finished piece is pictured below, click for a larger version.
Any questions or comments about this Photoshop tutorial please let me know down below.
Filed Under Tutorials | 6 Questions/Comments |
Comments & Questions
If you would like to make a comment, or ask me a question, please fill out the form below.
If you want a personalized image to appear with your comment you need a Gravatar.
Sign up for a Gravatar today. It's free and easy

February 15, 2010 9:42 PM
please explain the layer detail… it make me confused
February 16, 2010 9:47 AM
Please explain your problem more clearly… it make me confused.
October 24, 2010 3:57 PM
YAY, it sorta looks like it, I guess :S
December 4, 2010 4:47 PM
How do you create rectangles using values for size rather then dragging the image. Also how do you locate an object within an object a user inputted value from the edge?
Thanks
Dazed and Confused
December 12, 2011 6:48 AM
I’m stuck on makin the two circles and the rectangle because when I make a new channel and I make the first circle, it’s fine. I just don’t get how to make the second circle just like the first one with copying and pasting it because thats not an option that the program gave me.
May 25, 2012 3:05 AM
Thank you, thank you, thank you.
Very clear, and to the point.