Flaming Text Photoshop Tutorial
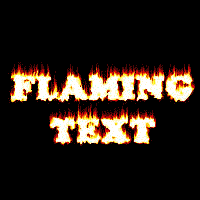
Are you ready to make some flaming text in Photoshop? Start up Photoshop and start with a greyscale image, white background black foreground. Choose a heavy type (I used Cooper Black) and then scoot the text down a little to allow yourself room for the flames. Once you have your text where you want it, right click the text layer and rasterize the layer. Rasterizing the text allows you to manipulate it.
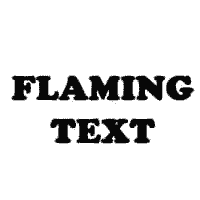
Now we are going to give the text a jagged look, which will make the flames more realistic later on. Go to your filters and choose Distort/Ripple. I used a setting of 100% for the amount and medium for size.
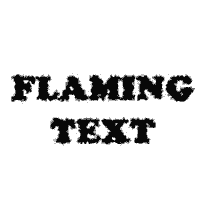
Flatten your image (Layer/Flatten Image) and then Invert the image (Image/Adjustments/Invert).
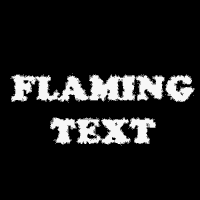
Then rotate the image 90 degrees counter clockwise.
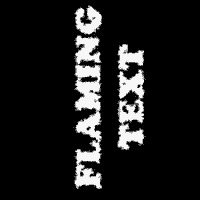
It is time to start making the flames themselves. Go to your filters and under Stylize choose wind blowing from the right. You may want to do this more than once, it just depends on the size of the image you are working with and how big you want your flames to be.
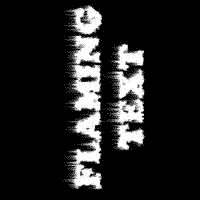
Those flames are a little too straight so let’s make them more flame-like. Go into your filters again and choose Distort/Ripple. Set the ripple values at: Amount 50 and the size at medium. (sorry if you can’t see the ripple effect in the picture trust me it’s there)
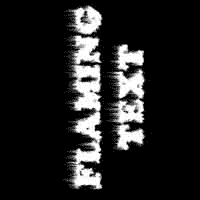
Rotate the image so that the flames are sticking up. For you not so quick ones out there rotate 90 degrees clockwise.
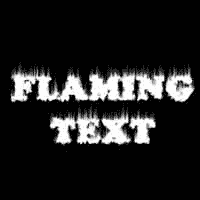
Apply the ripple filter again, use the same settings. This will make the flames look a little more realistic.
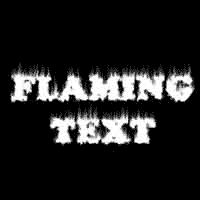
Now it is time to colorize the flames. Change the mode of the image to Index color (Image/Mode/Indexed Color). Once index is chosen go to your color table and choose Black Body. You can do this by going to Image/Mode/Color Table, and on the menu that pops up choose Black Body from the drop down menu.
And that my friends is how you make flaming text in Photoshop. Any questions or comments about this Photoshop tutorial please fill out the form below.
Filed Under Tutorials | 20 Questions/Comments |
Comments & Questions
If you would like to make a comment, or ask me a question, please fill out the form below.
If you want a personalized image to appear with your comment you need a Gravatar.
Sign up for a Gravatar today. It's free and easy

September 26, 2009 8:25 PM
How did you get from black and white to the orange color from index….. I don’t see how that is explained at all….
September 26, 2009 8:28 PM
if it changes anything I’m using CS2
September 26, 2009 8:29 PM
silly me. ignore my post
September 27, 2009 12:35 AM
heh, well glad to see you got it worked out 🙂
September 30, 2009 9:11 AM
Just wanted to thank you for sharing your turorial.. it was one of the better ones I found and was just perfect for my project. I tweeked it here and there… ( so the flames would only be on the top of the letter… and added a liqify filter to pull some individual flames off… )
Very Grateful,
Sheila
October 14, 2009 6:10 PM
I followed the tutorial exactly to a “T”. My flaming text looks really crappy compared to yours. I’m using CS4. Here is my image location http://img337.imageshack.us/img337/1641/flamingtext.png. Did I do something wrong?
October 14, 2009 6:31 PM
Brittany D, without having seen exactly what you did I have absolutely no way of knowing if you did something wrong. With the insides of your letters being black I would say you went wrong somewhere along the way.
October 14, 2009 6:56 PM
I redid the tutorial. Same image. The body of the text is still black and the flames look crappy. This is frustrating. http://img260.imageshack.us/img260/4197/flamingtext2.png
I have no idea where I keep going wrong. I made sure to follow each step appropriately. Could it be because we’re using different versions of PS? Grr.
October 14, 2009 7:44 PM
I just did the tutorial in CS4 and it worked just fine… on my second attempt. I am ran into the same problem you did and it was because I missed something in the very first step. I didn’t start with a greyscale image and instead used an RGB color mode and my results looked just like yours. When I did it again and used greyscale it turned out fine.
October 14, 2009 8:23 PM
Ohhhh, ok. No wonder! Thanks for figuring out the issue. I did miss the grayscale part. I just redid the tut and it turns out great! Whew! Pretty cool. Thanks!!
December 12, 2009 7:33 AM
I’m a begginer in flash how do I make the layers appear again after creating the flames
December 12, 2009 10:08 AM
Paul, this isn’t a Flash tutorial.
September 21, 2010 12:47 AM
This is great, i wish there were brushes for this,
November 8, 2010 8:45 PM
Thanks for the SIMPLE flame text tutorial with absolutely NO artistic talent required. You’re a lifesaver! 🙂
November 9, 2010 12:08 PM
Thanks for the SIMPLE minded comment that required absolutely NO iq at all. People can actually learn, and have from this tutorial. Unless of course your double edged comment was actually meant in a good way and you just fail and internet emphasizing.
January 12, 2011 1:05 AM
Thanks, its awesome.
March 24, 2011 5:22 AM
Really easy to understand and awesome affect 🙂 only thing? how do i put and use it with a standard Jpeg pic? 🙂
March 24, 2011 5:24 AM
I’m using cs2 as well, its good. makes no difference on cs5 or 2 🙂 🙂
March 23, 2012 8:11 PM
Hello! thx for the tutorial, it’s very helpful. One question here, The last result of my text become black color and the flame is orange after i chose blackbody.
March 24, 2012 10:38 AM
Newbix, it sounds like you are running into the same problem that Brittany D had. Make sure you don’t miss a step in the very first paragraph of the tutorial and start with a grayscale image.