Explosive Text Photoshop Tutorial
So you’re ready to make some exploding text in Photoshop? The first step is to start a new file with a white background and put in some black text. I find that a thicker stronger font works best (I used Photo here). When you have you text situated how you want it, rasterize the text layer (right click the text layer in the layers palette and choose rasterize layer). You have to rasterize text layers in Photoshop in order to manipulate them.

Next flatten the image and then duplicate it. In your new layer (should be called background copy) fill with white using the fill option (Edit/Fill) with the mode set to multiply. Now we are going to do a gaussian blur. Blur the image by 2 or 3 pixels.

Next, solarize the image. You can find this under Filter/Stylize/Solarize.

Next you’re going to set the levels. Go to Image/Adjust/Auto Levels.

OK you with me so far? Now you are going to duplicate the image again, this step is important, don’t miss it!!.
Then we are going to really screw with the image. Go to your filters and under distort choose Polar Cordinates, make sure that polar to rect. is checked and hit ok. You should get something like the image below.

Now rotate the image 90 degrees clockwise.
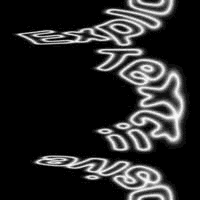
Invert the image (Image/Adjustments/Invert).

Now we’re going to screw with the image some more. Go to your filters and under Stylize choose wind. Make sure that you’re blowing from the right and that you’re on wind. Apply this filter three times.
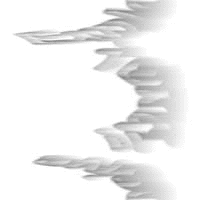
Next set the levels again using the auto levels command (Image/Adjustments/Auto Levels).
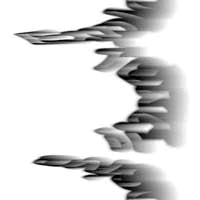
Invert the image yet again.
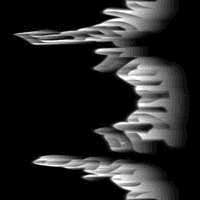
With the image inverted apply the wind filter three more times.
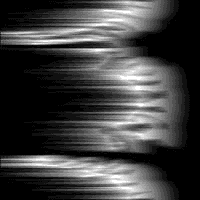
Rotate the canvas 90 degrees counter clockwise to get it off its side.
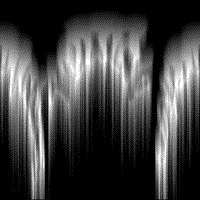
Now go back to your distort filters. Choose polar coordinates again but this time set it to rect. to polar.
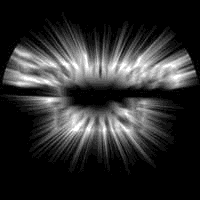
We are almost done, are you excited yet? Go to Image/Adjust/Hue Saturation and make sure that colorize is checked. Move the sliders around until you find a color scheme that you like and hit ok.
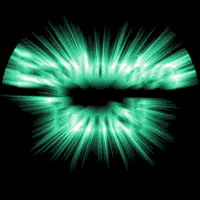
Remember way back when when I told you to duplicate a level, this is when it comes into effect. You should have three different layers. Move the middle layer so that it is on top. Set the mode to screen and fiddle with the opacity (75% or so is good) and you’re done!!!

If you have any questions or comments about this photoshop tutorial please fill out the form below.
Filed Under Tutorials | 6 Questions/Comments |
Comments & Questions
If you would like to make a comment, or ask me a question, please fill out the form below.
If you want a personalized image to appear with your comment you need a Gravatar.
Sign up for a Gravatar today. It's free and easy

October 15, 2009 3:35 PM
Is it possible to prevent the cutoff of the rays? Or does the polar coordinate always do that?
October 15, 2009 4:06 PM
The cut off happens when you use the wind filter and it blows the letters off the edge of your canvas. To avoid this either don’t use the wind filter as many times or increase your canvas size.
March 18, 2010 7:34 AM
If you are working on a larger document how do you make the rays really extrude out further. My document size is 10 inches wide at 300 resolution and the tut works however the rays are so close to the text at the end bc of the size. I want real long beaming rays behind? PLease help
March 18, 2010 8:58 AM
Did you try applying the wind filter more times?
March 23, 2012 8:54 PM
Sir, i think something is wrong or i may mistake too. but i saw you said ” flatten the image…” after rasterize the type so now only have ONE layer and then “duplicate it..” mean become TWO layer “””In your new layer (should be called background copy) fill with white using the fill option (Edit/Fill) with the mode set to multiply…….”””
Then at the last paragraph u said “”You should have three different layers.”” THREE layers??? i don’t get it.
March 24, 2012 10:34 AM
Newbix,
Next flatten the image and then duplicate it. In your new layer (should be called background copy) fill with white using the fill option (Edit/Fill) with the mode set to multiply. Now we are going to do a gaussian blur. Blur the image by 2 or 3 pixels.
At this point you will have two layers. The tutorial goes on for a few more steps
Next, solarize the image. You can find this under Filter/Stylize/Solarize.
Next you’re going to set the levels. Go to Image/Adjust/Auto Levels.
And then you see…
OK you with me so far? Now you are going to duplicate the image again, this step is important, don’t miss it!!.
And now you have three levels. I even state that this is an important step and not to miss it.